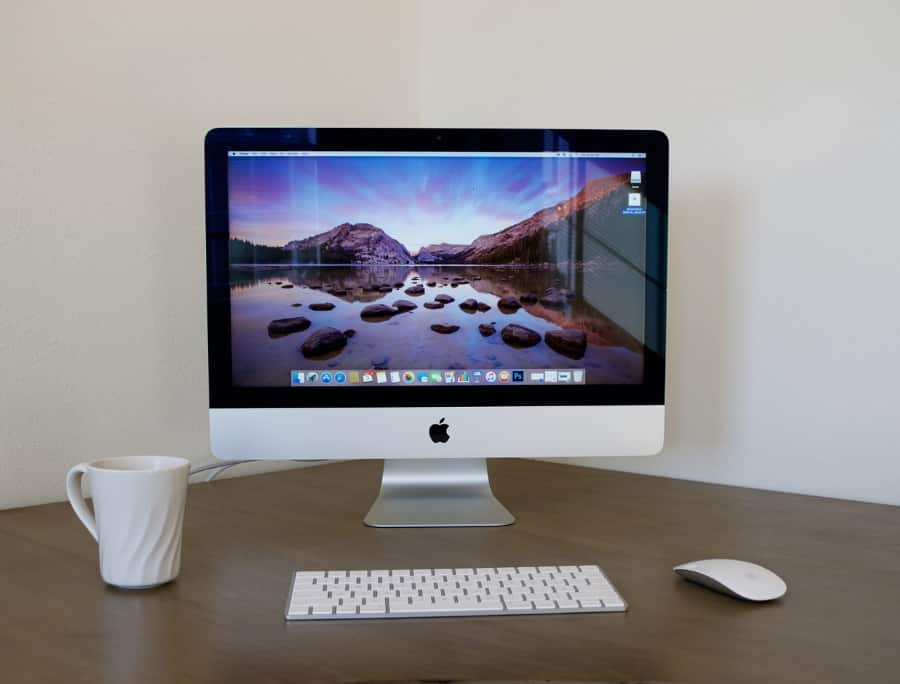
Macs are very reliable computers that will work 99% of the time. It’s that 1% that will occur at the most inopportune times that you have to concern yourself with. If something is going to go wrong with your Apple Mac, it’s going to happen when you are up against it. When you have a deadline or absolutely must use your computer for something vitally important. Knowing how to fix the basic issues common to Mac OS can help get you out of that pinch.
That’s what this page is all about. It’s a comprehensive guide we here at Dave’s Computer have put together to help all our customers. We have a couple of decades of experience troubleshooting Macs, Mac OS, Apple apps and other Apple products. We have put all that experience into this guide to help every Mac user fix some of the more common problems you’ll come up against as a Mac owner.
For anything more serious or for issues you cannot fix yourself, Dave’s Computers in New Jersey offers a full range of support services from Mac repairs to full Mac OS rebuilds. We got you covered.
For everything else, this guide should help. We tackle some of the most common faults you will experience and how to fix them. We hope it helps!
Common Mac startup issues
Let’s begin with boot problems. Anything that stops Mac OS loading normally so you can go about your work. Here are some very common challenges you might come up against when using a Mac.
Mac won’t turn on
If your Mac won’t start at all, there are a few things you can try at home.
- Check the plug. Make sure it is plugged in at the socket and the plug is secure.
- Check the cable into your Mac. Make sure the other end of the cable is securely connected to your Mac.
- Check the fuse. If you have a spare cable, use it to see if the fuse on your primary cable has gone. Alternatively, replace the fuse in the plug. This may require disassembly though.
- If you use a multiplug or UPS to clean the voltage, make sure that is working too. Plug the Mac directly into the wall outlet to test.
- Remove all peripherals and extra screens and retest. Something may be interfering with power. Removing everything except the keyboard is a good way to find out.
- Change the outlet. While rare, older homes are susceptible to electrical failure. If your Mac won’t start, try moving it to a different wall outlet. Test the outlet with a lamp or something to check.
If all those tests fail, there may be something fundamentally wrong with your Mac. If you have tried a different outlet, a different power cable and have tried booting it a few times but nothing works, bring it to our New Jersey Mac repair guys.
Mac turns on but won’t boot into Mac OS
If your Mac powers on okay but won’t load into the desktop, that could be something else entirely. There are a few fixes you can try at home for this.
Use Safe Boot
If your Mac powers on but won’t load into the desktop, you could try a Safe Boot. This runs internal diagnostics to try to identify the problem and fix it.
- Start your Mac and press the Shift key until the Apple logo appears.
- Release the Shift key when you see the login box. Log in and load the desktop.
- Open Terminal and type ‘fsck -fy’ and hit Enter. This will perform a file check that could take a few minutes.
If you see ‘The volume appears to be OK’, your file system works as advertised. If you see ‘FILE SYSTEM WAS MODIFIED’, run the command in Step 3 again by pressing the up key and Enter once more. Run it until you see ‘The volume appears to be OK’. Then reboot normally without going into Safe Boot.
If your Mac boots normally, you need not do anything else. If you recently installed any new apps or software, now might be a good time to remove them. Try using your Mac without the new app or program and reinstall it. If your Mac has trouble booting again, it is that program and not your Mac causing the problem.
Incompatible login items
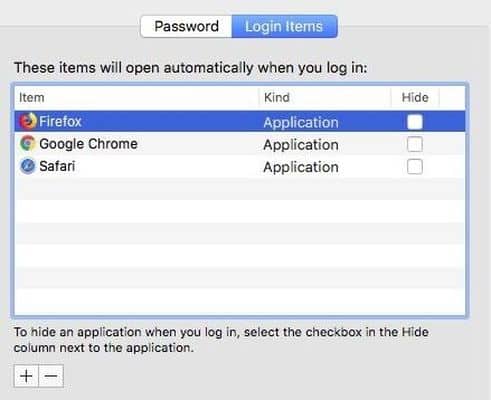
If you’re seeing a blue screen when you start your Mac or it just won’t boot properly, have you just installed a new program? It may be an incompatible login item that stops boot. That can be fixed easily.
- Boot into Safe Boot as above but don’t open Terminal.
- Open System Preferences and Users & Groups.
- Select your username from the list.
- Select Login Items from the right menu and uncheck the new program.
- Retry a normal boot.
This may require a little trial and error but new programs can cause your Mac to not boot properly. This is usually only if you have installed a new program recently, added a new user or made some other kind of system change.
Reset the NVRAM
Resetting NVRAM is a common fix for a number of issues, including boot problems. NVRAM stores some system settings and resetting it does fix some boot problems.
- Boot your Mac while holding down Command, Option, P and R until you hear your Mac restart.
- Let the keys go and let it boot as normal.
Reset the SMC
If resetting the NVRAM doesn’t work, you may have to try resetting the System Management Controller, SMC. This is where power and thermal management features are controlled from and may be interfering with normal boot. This is a task of last resort but done correctly, should not impact Mac OS at all aside from letting it boot normally.
- Shut down your Mac.
- Remove the power cord for 20 seconds.
- Reattach the power cord.
- Boot your Mac.
If you’re still having trouble booting your Mac after these steps, it’s time to visit Dave’s Computers. There is something more serious going on and you’re going to need expert help unless you’re very confident in managing your Mac.
Black screen on boot
The black screen on boot is the equivalent of Window’s blue screen. However, unlike the Windows equivalent, there are some workarounds to get your Mac booted properly. One method is to send it to sleep and then wake it again. Sounds strange but does work.
Hold the S and Power button on your Mac for 15 seconds. Even though you won’t see anything happening, it will send the system to sleep. Once you hear the fan stop. Let go the keys. Wait another 15 seconds and try a reboot.
Stuck on Apple logo
If your Mac gets stuck at the Apple logo, it means you have a corrupted bootloader, an app error, not enough disk space or a firmware issue. Despite that, you may be able to reboot. Press and hold the power button until the Mac shuts down again. Press it once to start up.
Mac OS should detect a problem and try to recover itself. If it can correct the issue, your Mac will boot normally. If it cannot fix it, continue troubleshooting.
Disk repair and Mac
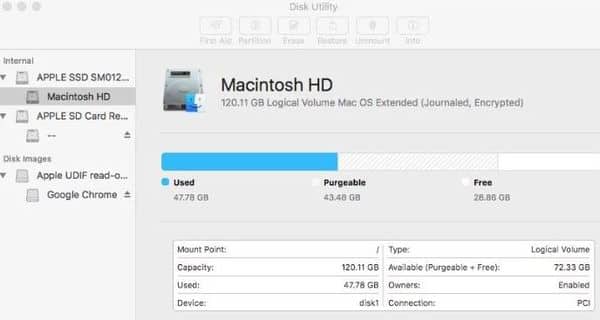
If your Mac is behaving strangely, there is a built in system for detecting faults with the file system. It is safe to use occasionally and can be enough to fix whatever is causing your Mac to play up. It is called Disk Utility and is an incredibly neat tool to use. We often use it here at Dave’s Computers as it really does come in useful!
You can repair your boot drive with Disk Utility or fix a secondary drive.
Repair your boot drive with Disk Utility
To analyze your boot disk, you will need to start your Mac in Recovery Mode. You can then run Disk Utility from there to diagnose exactly what’s going wrong.
- Start your Mac and hold down Command + R.
- Wait until you see the desktop and select Disk Utility.
- Select your main boot disk from the screen and select First Aid.
- Allow the process to complete which could take a while.
If the Disk Utility find errors on your disk it will try to fix them automatically. If there is nothing wrong with your disk, your Mac should reboot into normal mode.
Repair spare drives with Disk Utility
If your Mac boots normally but programs aren’t running correctly and they are installed on another drive, there may be an issue with the non-boot disk or file system. We can use the same Disk Utility to check but this time we don’t need to boot into Recovery Mode.
- Access Disk Utility with Command and Space and select Disk Utility or select it from Applications and Utilities.
- Select the disk you want to repair or diagnose.
- Select First Aid and select Run.
If you see a green tick when the process completes, your disk is fine. If you are shown a warning about disk life or condition, bring your Mac to us as soon as you can.
Mac won’t shut down properly
If your Mac won’t shut down gracefully or seems incredibly slow when shutting down, there are things you can do to troubleshoot. It may be a program that won’t close, it could be a file error that halts the shutdown process or it could be something else entirely.
Try a Force Quit
We wouldn’t recommend using Force Quit unless you’re having problems but it can be effective in the right circumstances. It is a more emphatic shutdown that bypasses any programs that aren’t letting the graceful close process and just quits everything.
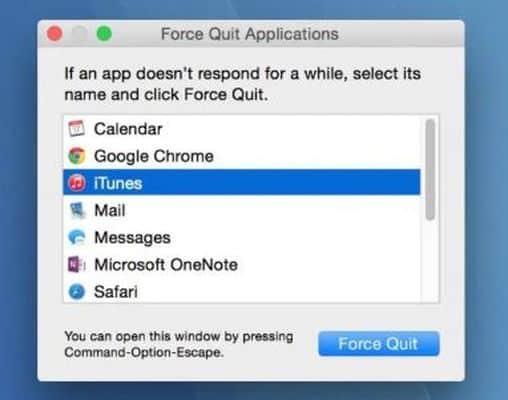
- Hold down Command + Option + Escape to access Force Quit.
- Select the application that isn’t responding from the list and select Force Quit.
- Allow shutdown to proceed.
If an application is stopping shutdown, you should see it in the popup box that appears. It may have ‘Not Responding’ next to it or it may not. Either way, once you shut down the program causing issues, your Mac should close gracefully as normal.
If you do identify an app that frequently causes shutdown to hang, you may want to check for updates for that program or look online for specific instructions. If it’s causing you problems it is likely causing other people problems too!
Use Apple Diagnostics
You can use Apple Diagnostics for most problems with a Mac but it can be particularly useful when your machine won’t boot or shut down properly. It’s a built-in program that will work through your entire system looking for file errors, disk issues and anything that will interrupt normal operation.
- Disconnect any peripherals except the keyboard and mouse.
- Select the Apple menu and Restart.
- Press and hold the D key while your Mac reboots.
- Follow the Apple Diagnostics wizard when it appears on screen.
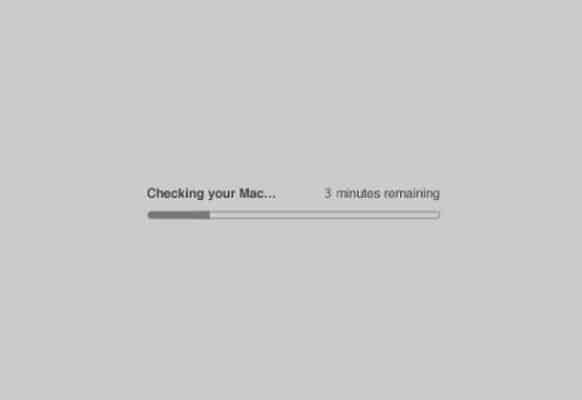
While it works you should see a plain gray screen and a progress bar. This could take a little while so don’t feel like you need to wait around. The tool includes self-repair features so if it finds anything it can fix, it will do so automatically. It will also display any issues it finds for you to follow up if necessary.
Use the Apple Hardware Test
The Apple Hardware Test is an extended test designed to make sure your computer hardware is operating as normal and is not causing your problems. It is very similar to Apple Diagnostics but takes things a little further.
- Disconnect any peripherals except the keyboard and mouse.
- Select the Apple menu and Restart.
- Press and hold the D key while your Mac reboots. You should see the option to use Apple Hardware Test.
- Select the language in the first window and hit Enter.
- Select ‘Perform extended testing’ and hit ‘T’ to begin testing.
The test will take a while so you might want to go do something else while it runs. When complete, the test will display what it finds on the screen. If it finds a hardware issue, it will say so. It will also tell you what is causing problems and perhaps why. Take the appropriate action depending on what it says.
If you’re still having trouble getting your Mac to shut down gracefully, bring it to Dave’s Computers in New Jersey.

General Mac troubleshooting
We have covered booting and shutting down your Mac so let us move on to general troubleshooting. We will list some common errors you may come across in the daily use of your Mac and provide simple solutions to work around them.
Spinning Beach Ball
The Spinning Beach Ball is a common occurrence if you have been using your Mac for any length of time. Mac OS is a very stable system that doesn’t slow down like Windows but it is still software so can be susceptible to the same problems every type of computer can suffer from.
The spinning beach ball appears when the Mac is busy performing one or more actions. It just means ‘give me a minute to finish these tasks’. If the spinning beach ball lasts too long, it could mean something else.
Open Activity Monitor and see what’s up. If you see a program using all your resources, stop the program or Force Quit.
Low disk space
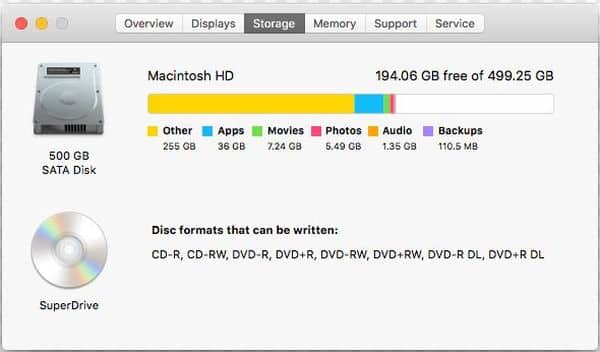
One common cause of issues with a Mac is not having enough free space for Mac OS to work normally. Apple suggests a minimum of 10% free disk space. Not only can low disk space cause problems when you want to install new applications, it can also cause the spinning beach ball like above or other stalling or stuttering with your computer.
- Select the Apple icon in the top left of your desktop.
- Select About This Mac and then Storage.
You should now see a menu showing your disk(s) and the used and free space. If yours is almost full, you should have a clearout.
- Navigate to /Library/Caches on your computer and delete the largest files.
- Empty the trash can. Ctrl click your trash can and select Empty Trash.
- Uninstall apps you don’t use.
- Navigate to ~/Music/iTunes/Previous iTunes Libraries and delete anything you don’t need.
- Navigate to ~/Library/Application Support/MobileSync/Backup/ and delete old backups. Keep the most recent.
- Navigate to ~/Library/iTunes/iPad Software Updates and delete anything you don’t need.
- Navigate to ~/Library/iTunes/iPhone Software Updates and delete anything you don’t need.
- Clear out your Images, Movies, Music and Download folders. Delete anything you don’t need.
By now you should have cleared out many gigabytes of free space from your disk drive. There is a lot more you can do to free up disk space but these steps should have reduced used space significantly already.
Mac keeps dropping WiFi
If you use WiFi instead of Ethernet, you may find your Mac can drop the connection. If you use a MacBook, you will definitely find it loses the connection fairly regularly. This is how to fix it.
- Select System Preferences and Network.
- Select the Advanced button on the left.
- Select the WiFi network your Mac keeps dropping and select ‘-’ to remove it.
- Select the WiFi icon from the menu bar and reconnect.
The Network window shows all the WiFi networks your Mac has ever joined. Clearing these out will force the Mac to query the network again and set up a new connection. If you’re using a Mac, the number of WiFi networks will likely be limited. If you use a MacBook, there may be many more in there.
Mac keeps losing internet connection
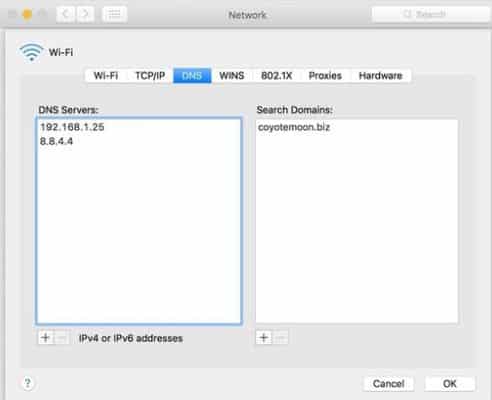
The network hardware with newer Macs is very reliable and should rarely go wrong. Apple did drop the ball and release a driver that killed Ethernet but that was fixed long ago. One useful fix is to reconfigure your DNS settings. This can not only make for a stable internet connection but also make it a little faster too.
Essentially, we switch from using your ISPs DNS to Google’s. Google DNS is widely regarded as the fastest available so can actually speed up your surfing a little as well as fixing issues.
- Close any web browsers you have open.
- Select the Apple Menu and System Preferences.
- Select Network and select your Ethernet connection on the left.
- Select Advanced and select the DNS tab.
- Select the ‘+’ to add a new DNS server.
- Add two DNS, 8.8.8.8 and 8.8.4.4.
- Select the two DNS addresses that were already present.
- Select ‘-’ to remove them.
- Select OK to save your changes.
- Repeat for WiFi, Ethernet and any other connection you have.
Safari crashing
Safari is a pretty good web browser and competes well with Chrome. There are a couple of common issues with the Apple browser that you might come up against. One is when it crashes frequently with no obvious cause. There are causes of course but they aren’t always obvious. One common cause is an issue with the cache and another is an incompatible browser extension.
Clear the Safari cache:
- Open Safari.
- Select Preferences and Advanced.
- Check the box next to ‘Show Develop menu in menu bar’.
- Select the Develop menu and Empty Caches.
- Restart and retest Safari.
Often just clearing the cache is enough to make Safari work normally again.
If that doesn’t work, you need to disable any browser extensions. If Safari works normally when extensions are disabled, you should enable one at a time until Safari begins crashing. That final extension you enabled is likely the one causing the issues.
- Open Safari and select the Develop menu.
- Select Disable Extensions.
- Restart and retest Safari.
If Safari works properly now, gradually enable or re-add extensions until it begins crashing again. Disable the most resent extension, retest and if Safari works, it is that final extension. Replace it or update it to fix the problem.

Mac Kernel Panic
‘Kernel Panic’ sounds quite dramatic but all it describes is a situation where Mac OS cannot find a clear way forward to finish its current process. It can result in constant reboots without being able load into Mac OS. Kernel Panic can be caused by lack of memory or disk space, outdated drivers, incompatible peripheral devices or file corruption.
You only need to try Step 3 if Step 2 doesn’t work. The same for Step 4. Retest and try the next step if you still see Kernel Panic.
- Remove all peripherals except mouse and keyboard. Especially if you added anything new recently!
- Perform a Safe Boot as we described earlier and update all your drivers, apps and Mac OS itself.
- Run Repair Disk as we described earlier.
- Free up disk space as you now know how to do.
One of these steps should over come Kernel Panic. If not, remove power from your Mac completely, leave for 30 seconds, replace power and try again. That should reset any residual files in memory and force a clean boot.
How to update your Mac
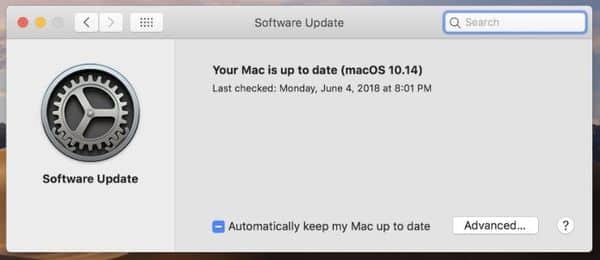
While not an answer to a specific issue with a Mac, keeping your OS and all your applications updated is a key troubleshooting step. It is also preventative as an updated system will be a stable system in the vast majority of cases.
Keep your Mac updated like this:
- Select the Apple Menu and select System Preferences.
- Select Software Update to check for any available updates.
- Select Update Now if there are updates to be had.
We would suggest checking the box next to ‘Automatically keep my Mac up to date’ as Mac OS will check regularly for updates and install them. This can prevent all manner of problems with your Mac.
Mac stuck installing a macOS update
Nothing strikes fear into a computer owner more than seeing ‘The macOS installation couldn’t be completed.’ It means the update you were doing cannot proceed and you will have to begin again. You may also see the spinning beach ball for eternity and wonder what’s going on.
First, press Command + L to bring up the log. This will give you an idea of whether the process has stalled or whether it is just taking longer than usual.
If you see ‘The macOS installation couldn’t be completed’ or the spinning beach ball lasts forever, follow these steps.
- Press and hold the power button until your Mac shuts down completely.
- Wait 15 seconds then boot normally.
- Navigate to the App Store and select Updates.
- Try to continue the installation process from there.
This will often shake out the spinning beach ball and sometimes stop you seeing ‘The macOS installation couldn’t be completed’ too. That last isn’t always a permanent error, just something stopping the update completing. Either way, try it and see how it goes for you.
Perform a clean install of Mac OS
We regard reinstalling the operating system a process of last resort. It requires a bit of work and you have to backup your files and data before you do it but the result can be a fully operational Mac that works like it did when it was fresh out the box. If not, you may need to get help for Mac data recovery as well.
If you don’t want to do this yourself, bring your Mac to Dave’s Computers in New Jersey and we will be happy to do it for you.
Before you start, make sure to back up anything you want to keep to an external drive or somewhere safe. This process will delete all files on your main drive.
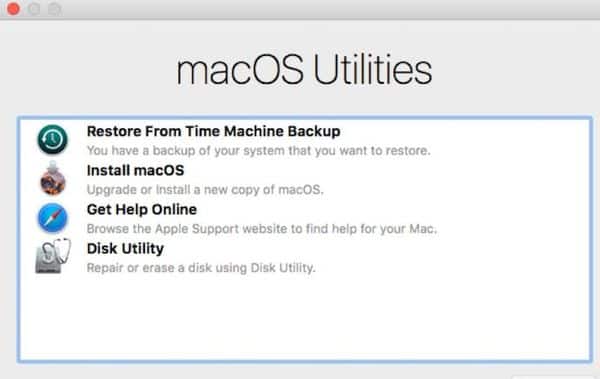
When you’re ready to install Mac OS, do this:
- Hold Command + R and reboot your Mac.
- Release the keys when you see the Apple logo.
- Select Disk Utility in the macOS Utility window and select Continue.
- Select Startup Volume and then Unmount.
- Select Erase and exit Disk Utility.
- Select Reinstall Mac OS and select to Continue.
- Follow the installation wizard that appears.
Once installed, you will need to set everything up again and register the computer as yours with your Apple ID. Once logged in, run a system update which is described under ‘How to update your Mac’ above. Once complete, you can begin using your Mac as usual.
FAQs for Mac owners
If you’re a Mac owner, there are likely more than a few questions you would like answered about the computer, how it works and the ownership experience. Here are a few of the more common questions we see and hear at Dave’s Computers in New Jersey.
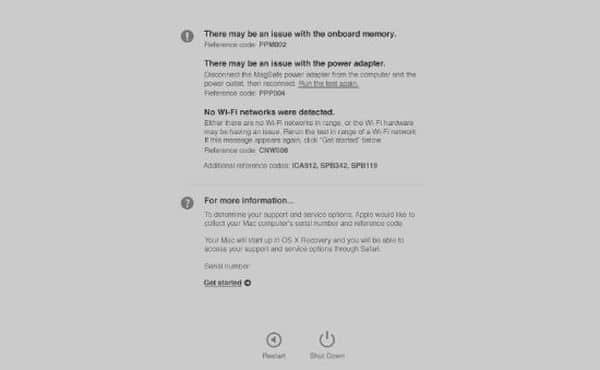
How do I run a diagnostic on my Mac?
We covered diagnostics a little earlier but as this is a specific question we are often asked, we will cover it once more here.
- Disconnect everything from your Mac aside from your keyboard and mouse.
- Turn on your Mac while holding down the D key. Hold until you see the language screen.
- Select your language and you should begin to see a bar showing diagnostic progress.
- Note any Apple Diagnostics reference codes the tool provides once complete.
What happens next depends on what the diagnostic tool has found. If it detects hardware errors and your Mac is within warranty select ‘Get Started’. If you’re out of warranty, contact us here at Dave’s Computers.
If it detects a software error, you could run the test again and see if the tool can fix it or use one of the file system fixes we have outlined earlier in this guide. If the tool finds nothing wrong, try Disk Utility or Disk Repair.
Why is my MacBook not starting up?
This guide covers many of the most common boot issues you’re likely to see with a Mac. Check the ‘Mac won’t turn on’ section or ‘Mac turns on but won’t boot into Mac OS’ section of this guide to help. Both sections cover the majority of issues you’re likely to see if your computer won’t boot as it should.
Does Apple charge for diagnostics?
If your Mac is under warranty, all diagnostics and most Mac repairs will be covered under that warranty. If you did something or made changes that invalidated that warranty, you may be liable for charges. The Genius Bar will not usually charge for diagnostic tests regardless of warranty. They need to run these tests in order to find out what’s wrong with your computer. You will often find tests are free but repairs will cost money.
How do you fix a black screen on a Mac?
Black screens can be caused by a number of problems but you won’t always know what’s up because you can’t see anything on the screen. An effective way around the black screen is to use a keyboard sequence. Your Mac should boot into the desktop as normal ready for you to continue diagnostics.
- Power on your Mac by pressing the power button once.
- Press the S key which would normally send the Mac to sleep.
- Hold down the power button to force a shutdown.
- Wait 15-20 seconds and then press the power button again to boot.
If this works, your Mac should now boot into the desktop as normal. If you keep seeing the black screen when booting, run Apple Diagnostics to try to find out what’s wrong.
How do you force restart a Mac?
If your Mac freezes or keeps stuttering, a force restart may be your only option. It isn’t the best thing to use in every situation but can be very effective if your Mac just sits there and won’t respond.
Press Command and Control and press power to bring up the dialog box and hit Restart from the options.
How can I improve the performance of my Mac?
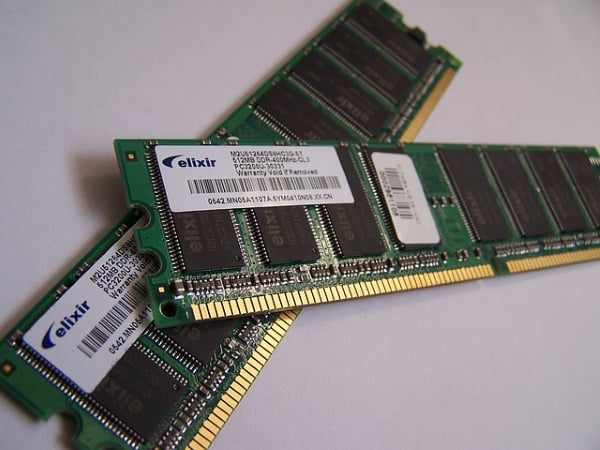
On the whole, Macs perform very well. They aren’t as capable as scratch built PCs but they are much easier to live with so it’s a compromise. If you find your Mac struggling with the latest applications, there are some things you can do to improve performance.
- Add more RAM. Macs are RAM hungry, as are the applications we all use. Adding more memory is the most effective way to boost performance.
- Maintain disk space. Mac OS needs at least 10% free space to perform at its optimum. Use the tricks in this guide to free up disk space if you need to.
- Remove programs you no longer use. If you have programs installed that you don’t use, uninstall them. It frees up space, prevents any standby processes for hogging resources and ensures the programs you do use have the resources they need.
How do I know if my Mac hard drive is failing?
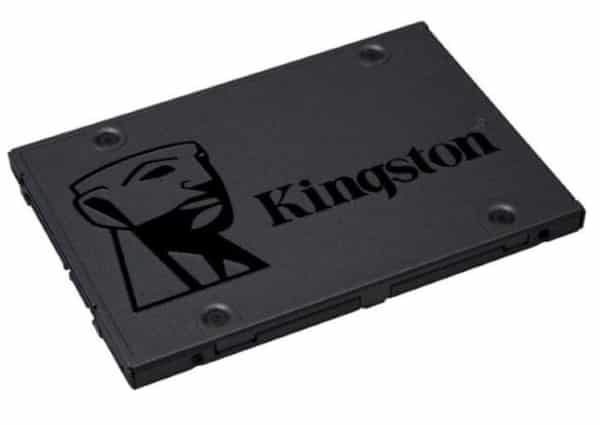
Hard drives are a pivotal part of a Mac’s performance so keeping it healthy is paramount. There are some signs that a hard drive may be failing which can warn you in advance to prevent data loss.
- Errors in Disk Utilities.
- Inaccessible files or folders.
- Programs stuttering, crashing or behaving strangely.
- Frequent system crashes, black screens or failure to boot.
- Unrecognizable hard drive on boot.
If these symptoms appear once or infrequently, there is likely nothing to worry about. If they occur frequently, more investigation is needed right away. Back up your important files immediately so you don’t lose them and either take your Mac to a Genius Bar if it’s under warranty or bring it to Dave’s Computers if it isn’t.
Do you need to defrag a Mac?
Windows is notorious for having a messy file system and for needing frequent defragmenting to keep things working efficiently. Macs work differently. Where Windows uses a fragmented file system, i.e. it breaks up files into small chunks and rebuilds them when required, Mac OS does not.
Mac OS retains smaller files as a coherent whole and only fragments larger files. The nature of the file system means it is many times more efficient that Windows so will rarely, if ever need degragging. If you have an SSD (Solid State Drive) in your Mac, you should never, ever defrag that. They don’t need it and it can shorten its operating life.
Is it safe to clear cache on Mac?
One of the disk cleaning techniques we describe in this guide and recommend to our Mac repair customers is to clear the cache. Is it safe to do this? Yes it is!
Clearing the cache is the same as taking out the trash. We remove all the stuff we don’t need to clean up the OS and to make space for more stuff. As long as you don’t delete anything from /System/Caches, you should be fine. That folder can be cleared if you’re troubleshooting a file issue but not just for clearing space.
Mac troubleshooting
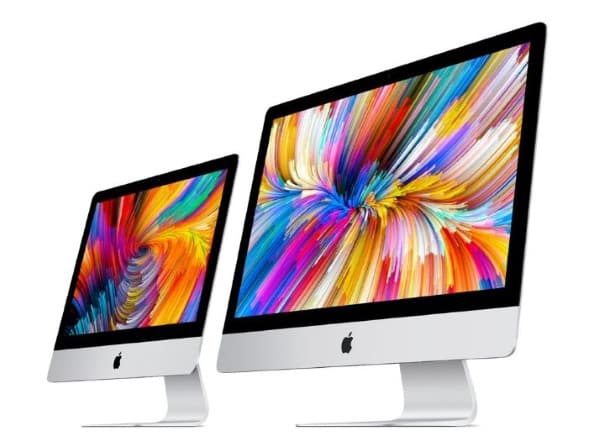
The Apple Mac is a very accomplished computer. It is more expensive than its Windows counterparts but it is also more user friendly, more secure and much more efficient. You should also have far fewer issues with Mac OS than with Windows and you will quickly get used to your Mac just working and always being there when you need it.
That said, there are still things that can go wrong. Not often but occasionally. That’s why we put this guide together. To help you troubleshoot your Mac on the rare occasions that it doesn’t provide the reliable service Macs are known for.
If you cannot fix the problem, want more help or would prefer to use experts rather than do it yourself, we can help. Dave’s Computers in New Jersey has decades of experience working with Apple computers. Our team has the skills, the tools and the techniques to address any issue you’re facing with your Mac. Bring it to our store for Mac repairs and we’ll have it up and running in no time!
###

