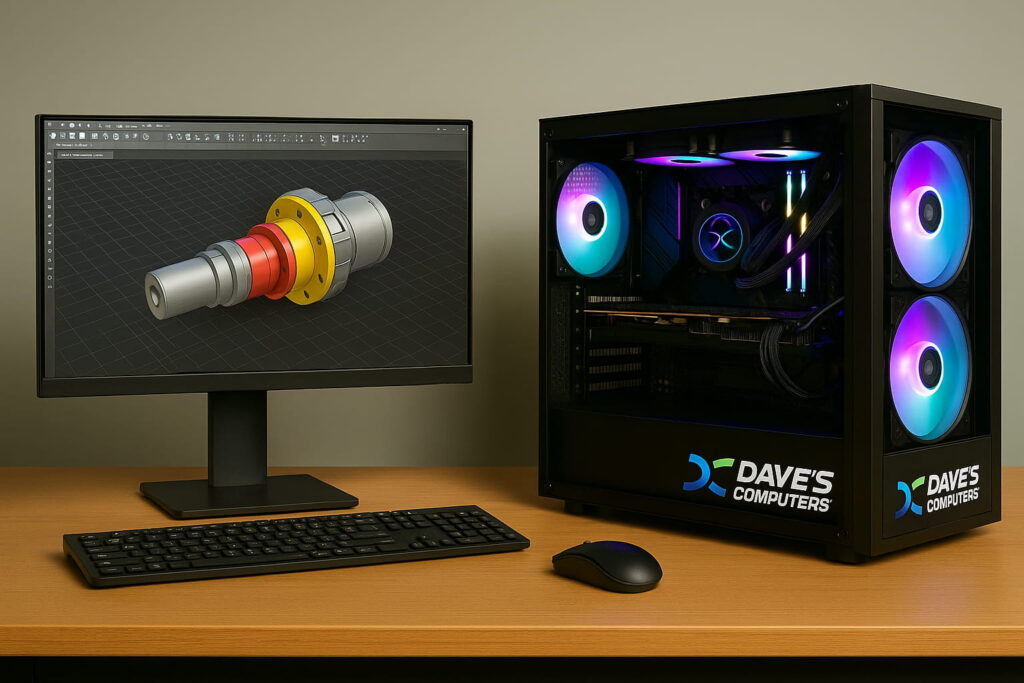
How to Install Windows on a New PC Build — Step by Step Guide
I'm Dave. I've been building and setting up custom PCs in Somerville, NJ since 2011. This guide covers everything — from creating your bootable USB to getting past Windows setup, including how to skip the Microsoft account requirement during OOBE if you'd rather keep it local.
What You Need Before You Start
Get everything on this list together before you touch the BIOS. Missing one item mid-install is the most common reason people get stuck.
- A USB drive — 8GB minimum, 16GB recommended. Everything on it gets wiped. Don't use one with anything you need.
- Windows 11 ISO downloaded directly from Microsoft. Go to microsoft.com/en-us/software-download/windows11 and use the "Download Windows 11 Disk Image (ISO)" option. Don't download from third-party sites.
- Rufus — free tool at rufus.ie for creating the bootable USB. It also has a bypass option built in (more on that below).
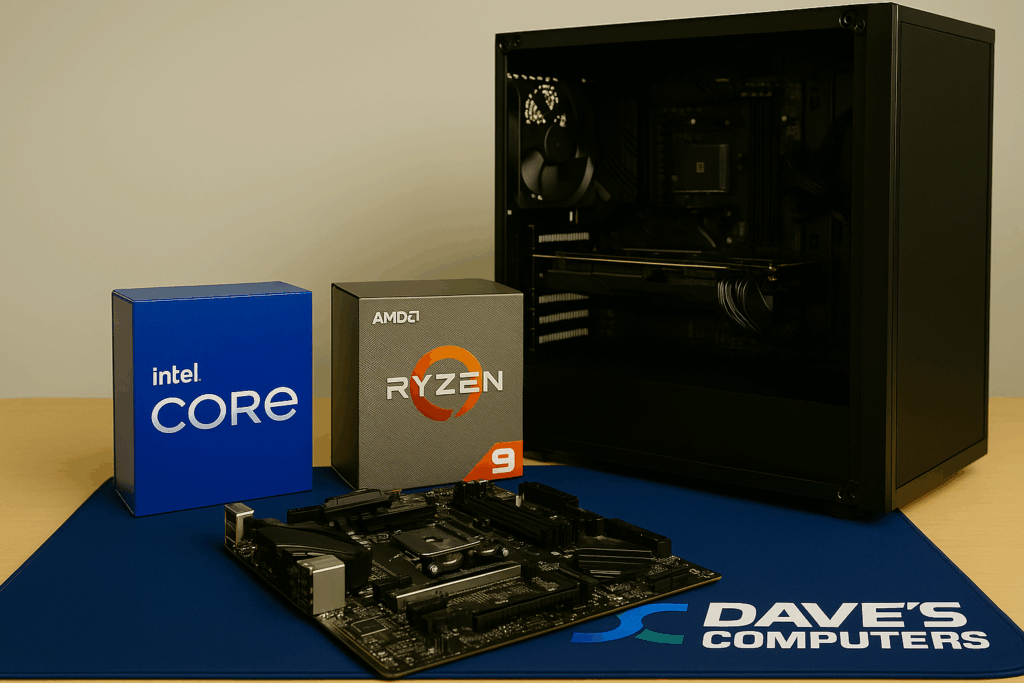
- Your Windows product key — if you have one. New builds using a digital license tied to a Microsoft account can often activate automatically. Retail keys come on a card or email from the retailer.
- Motherboard manual. You'll need it to confirm which BIOS settings to enable (Secure Boot, TPM 2.0, UEFI mode, XMP/EXPO for RAM). Every board is different.
- An internet connection — either Ethernet cable plugged in, or your Wi-Fi password nearby. Windows Update and driver downloads happen right after setup.
- GPU drivers downloaded in advance (optional but smart). If you have a discrete GPU, download the latest driver from NVIDIA or AMD onto a second USB drive before you start, in case Windows can't find it automatically.
Step 1 — Create Your Bootable Windows USB with Rufus
Do this on a working PC before you touch your new build. Takes about 10–15 minutes depending on your USB write speed.
Download and open Rufus
Go to rufus.ie and download the latest version. No install needed — just run it. Plug in your USB drive. Rufus will detect it automatically.
Select your Windows ISO
In Rufus, click the SELECT button and navigate to the Windows 11 ISO you downloaded from Microsoft. Rufus will auto-configure most settings once it reads the ISO.
Choose your Microsoft account bypass option (optional — do it now, not later)
When Rufus asks about "Windows User Experience," you'll see checkboxes including "Remove requirement for an online Microsoft account." Check this box if you want to create a local account during setup. This is the cleanest and most reliable bypass method — it bakes the skip directly into the installer before Windows even starts. See full bypass method details in Section 5 below.
Click START and wait
Rufus will warn you that all data on the USB will be destroyed. Confirm and let it run. The write process takes 5–15 minutes. When it shows READY at the bottom, the USB is done. Safely eject it.
Step 2 — Configure BIOS Before You Boot the USB
This is where most first-time builders get stuck. Windows 11 requires specific BIOS settings to install. Get these right first.
Set boot mode to UEFI — disable CSM / Legacy Boot
Find the boot settings in your BIOS and make sure UEFI mode is selected. Disable CSM (Compatibility Support Module) or Legacy Boot if it's present. Windows 11 requires UEFI. If CSM is enabled, Secure Boot and TPM may be hidden or non-functional.
Enable Secure Boot
Find Secure Boot and set it to Enabled. Windows 11 requires it. If Secure Boot is grayed out, CSM is likely still enabled — disable CSM first, then come back. On some boards you'll also need to be in "Standard" mode, not "Custom."
Verify TPM 2.0 is enabled
Windows 11 requires TPM 2.0. On Intel boards look for Intel PTT (Platform Trust Technology) — enable it. On AMD boards look for AMD fTPM (Firmware TPM) — enable it. These are software-based TPM solutions built into the CPU and are available on most hardware from 2016 onward.
Enable XMP or EXPO for your RAM (don't skip this)
This isn't required for Windows to install, but your RAM is almost certainly running at 2133MHz by default instead of its rated speed. Find XMP (Intel) or EXPO (AMD) in BIOS — usually on the main page or under AI Tweaker / D.O.C.P. — and enable it. One click, big difference.
Set boot order — USB first
In the Boot tab, move your USB drive to the top of the boot order. Save settings and exit (usually F10). The PC will reboot and should start loading from the USB. If it boots into a "no OS found" screen, the USB wasn't created correctly or isn't being recognized.
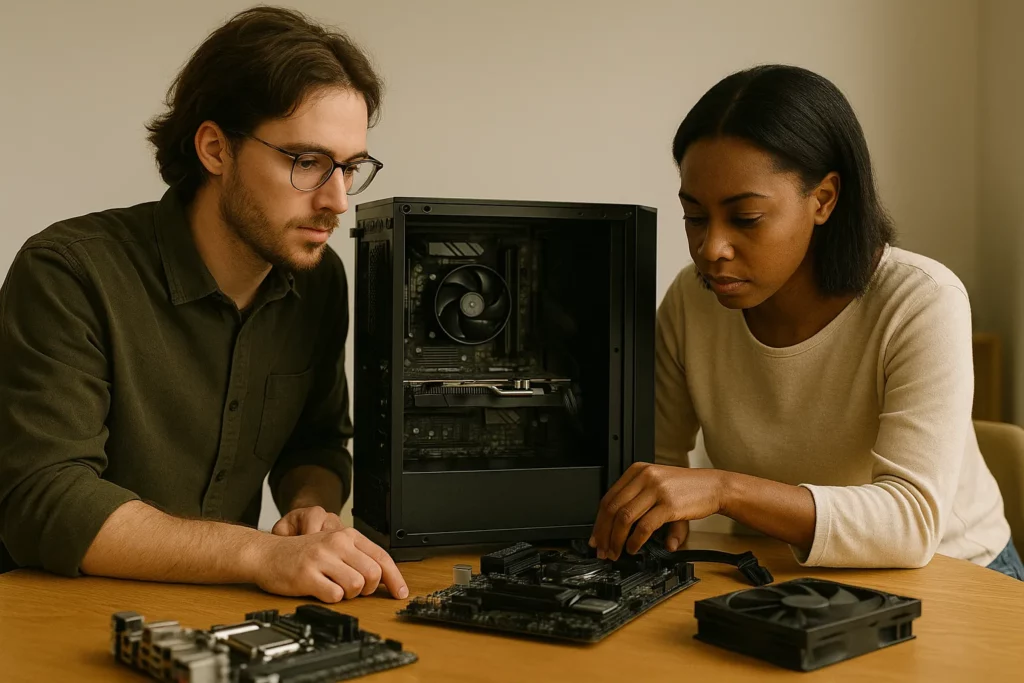
Step 3 — The Windows Installation Process
Once you boot from the USB, the installer takes over. Here's what each screen means and what to actually click.
Language, time format, and keyboard
Leave these as default for most US installs. Click Next, then Install now.
Enter your product key — or skip it
If you have a retail key, enter it now. If you're planning to activate digitally later (reusing a license tied to a Microsoft account) or you'll activate after setup, click "I don't have a product key." You won't lose functionality during install — activation can happen any time after.
Select Windows 11 edition
Choose Windows 11 Home for most personal or gaming builds. Choose Windows 11 Pro if you need BitLocker, Remote Desktop hosting, Hyper-V, or domain join. Your product key determines which edition activates — if you skip the key, pick the edition that matches what you purchased.
Accept the license agreement, then choose "Custom: Install Windows only"
On the installation type screen, choose Custom — not Upgrade. You're doing a clean install on a new build. Upgrade is for keeping files and apps from an existing Windows installation.
Select your drive and partition
You'll see a list of drives and partitions. For a brand new NVMe SSD with no existing data, select the drive (it will show "Unallocated Space") and click Next. Windows will create the required partitions automatically. Don't manually create partitions unless you have a specific reason.
Drive not showing up? Some NVMe drives require a storage driver to be loaded during setup. Click Load driver, point it to the driver files (on a second USB), and your drive will appear. Check your motherboard manufacturer's site for the appropriate Intel RST or AMD RAID/AHCI driver.
Wait — this takes 10–25 minutes
Windows copies files, expands them, installs features, and reboots several times. Don't touch anything. When it reboots, it will load from the hard drive automatically (not the USB again) — that's normal. Eventually it will land on the OOBE screen.
The Microsoft Account Screen — How to Skip It
Windows 11 will push hard to get you to sign in with a Microsoft account during OOBE. You don't have to. Here are every method that still works as of 2025 — ordered from easiest to most involved.
Method 1: Rufus "Remove Microsoft Account" checkbox
Works on: All Windows 11 versions including 24H2 and 25H2. Most future-proof option.
- 1Create your USB with Rufus as described in Step 1
- 2When Rufus asks about "Windows User Experience", check "Remove requirement for an online Microsoft account"
- 3Optionally also check "Disable data collection" to skip privacy telemetry screens
- 4Complete the install normally — OOBE will offer a local account option automatically
Method 2: "Domain Join Instead" during OOBE
Works on: Windows 11 Pro, all builds. Does not work on Home edition.
- 1During OOBE, when asked to sign in with a Microsoft account, select "Set up for work or school"
- 2On the next screen, click "Sign-in options"
- 3Click "Domain join instead"
- 4Enter a local username and password — you're done
Method 3: Registry BypassNRO via Shift+F10
Works on: Windows 11 Home and Pro, most builds as of mid-2025. May stop working in future updates.
- 1During OOBE, when you hit the network or Microsoft account screen, press Shift + F10 to open a command prompt
- 2Type the following command and press Enter:
- 3Then type
shutdown /r /t 0and press Enter to reboot - 4OOBE restarts — this time you'll have an "I don't have internet" option that leads to local account creation
Method 4: WinJS Developer Console
Works on: All Windows 11 editions including S Mode and 25H2 Preview builds. Cannot be used from the network or Microsoft account screen.
- 1During OOBE, navigate to the Secondary Keyboard Layout screen (the one after region and keyboard — do not click Skip yet)
- 2Press Ctrl + Shift + J to open the Developer Console
- 3Type exactly:
- 4Press Escape to close the console — the keyboard layout screen refreshes
- 5A Windows 10-style local account creation screen appears — enter username, password, and security questions
Step 4 — After Windows Installs: Drivers and First Setup
Getting Windows installed is half the job. A fresh install with no drivers is missing critical functionality. Here's what to do in the first 30 minutes on the desktop.
Run Windows Update immediately — before anything else
Go to Settings → Windows Update → Check for updates and let it run completely, including optional updates. This pulls in many device drivers automatically and patches security vulnerabilities in the fresh install. Reboot when prompted.
Install your GPU driver from NVIDIA or AMD directly
Don't rely on the generic Windows display driver. Download the latest driver for your specific GPU from nvidia.com/drivers or amd.com/support. For NVIDIA, use the "Game Ready" driver. For AMD, use Adrenalin software. Run the installer, reboot.
Install your motherboard chipset driver
Go to your motherboard manufacturer's support page, enter your model number, and download the chipset driver. For Intel boards, this is the Intel Chipset Device Software. For AMD boards, this is the AMD Chipset Drivers package. These improve USB controller performance, storage controller behavior, and power management.
Install audio and network drivers if needed
Most modern builds get audio and network drivers through Windows Update. But if you have no sound or no network, grab the drivers from your motherboard manufacturer's support page. Look for Realtek Audio, Intel LAN, or whatever chipsets your board uses. The manual will list them.
Enable XMP/EXPO in BIOS if you haven't already — then verify RAM speed in Windows
If you skipped XMP/EXPO during the BIOS setup, go back now. After enabling it and rebooting, verify in Windows: press Ctrl + Shift + Esc → Performance tab → Memory. The "Speed" shown should match your RAM's rated speed. If it shows 2133MHz on DDR5-6000, XMP/EXPO is still disabled.
Activate Windows
Go to Settings → System → Activation. If you entered a retail key during install, it should show as activated. If you linked a digital license to your Microsoft account on previous hardware, sign in to activate. If it's not activating automatically, use "Change product key" and enter your key manually.
🖥️ Rather have us build and set it up? Drop off your parts or let us source them. We handle the full build, Windows installation, all drivers, and initial setup — ready to use when you pick it up.
📞 Call (908) 428-9558 — Custom Build InfoWalk-in welcome · No appointment needed · Drop-off only · 75 N Bridge St, Somerville NJ
Custom Builds from Central New Jersey
From budget gaming builds to high-end workstations, customers across NJ trust us with their custom PC builds and setups.
"Bought all my parts and had no idea how to get Windows installed. Dave's set the whole thing up — BIOS, Windows, drivers, everything. Picked it up ready to go. Worth every dollar."
"Tried to install Windows myself and kept getting stuck at the Microsoft account screen. Used the WinJS trick from this guide and it worked perfectly. Finally have a clean local account setup."
"NVMe drive wasn't showing up during install — brought it to Dave's, they loaded the right driver in five minutes and got Windows on it same day. Saved me hours of frustration."
Common New Build Mistakes We See in NJ
After building and setting up hundreds of custom PCs at our Somerville shop, here are the problems we see most often.
⚡ XMP/EXPO Never Enabled — RAM Running at Half Speed
Easily the most common oversight on new builds. DDR5-6000 kits sitting at 2133MHz because XMP was never enabled in BIOS. One toggle, free performance boost. We check this on every build we set up.
🔒 CSM Still Enabled — Blocks Secure Boot and TPM
Builders who've worked on older hardware sometimes leave CSM on out of habit. This hides or disables Secure Boot and TPM 2.0 in BIOS, which blocks Windows 11 from installing correctly. Disable CSM first, then enable Secure Boot and TPM.
💿 NVMe SSD Not Detected During Windows Setup
Some Intel 12th/13th gen builds and certain AMD 500-series boards need an Intel RST or AMD RAID driver loaded during Windows setup for the NVMe drive to appear. Without it, the drive list is blank and people assume the SSD is dead. It's not — it just needs a driver.
🔑 Activating Windows with the Wrong Key Edition
Entering a Home key when Windows 11 Pro is selected (or vice versa) causes activation to silently fail. The key doesn't error out immediately — it just doesn't activate. If your key isn't working, verify you're on the correct edition in Settings → System → Activation.
Why NJ Builders Choose Dave's Computers
We've been building and setting up custom PCs in Somerville since 2011. Here's what that means for you.
Full Build Service
Drop off your parts or have us source them. We handle the build, Windows install, all drivers, BIOS tuning, and initial setup.
Proper BIOS Configuration
XMP/EXPO enabled, Secure Boot set, TPM verified, power profiles tuned. Every build leaves here configured correctly — not just "boots."
Your Hardware Stays Here
Your parts never ship anywhere. We build in-shop at 75 N Bridge St — same people, same address, accountable if something goes wrong.
Straight Answers on Parts
Not sure if your parts are compatible? Bring the list. We'll tell you what works, what to swap, and whether something is a bad value for what you're trying to build.
Fast Turnaround
Most builds are completed within 2–3 business days. Simple Windows installs on pre-assembled hardware often same or next day.
14 Years in Business
Serving central NJ from Somerville since 2011. 300+ Google reviews. We'll be here if something needs attention after the build.
Windows Install FAQs for NJ PC Builders
Common questions we get from customers building their first PC or setting up Windows in New Jersey.
Can I install Windows 11 without a Microsoft account in 2025?
Yes, but the old OOBE\BYPASSNRO command no longer works in Windows 11 25H2 and later. The methods that still work: the Rufus "Remove Microsoft account" checkbox (best option — do it before install), Domain Join (Pro only), the Registry BypassNRO command via Shift+F10, and the WinJS Developer Console method. All four are covered in detail in Section 5 of this guide.
My NVMe SSD isn't showing up during Windows setup — what do I do?
Some motherboards require a storage controller driver to be loaded during setup before NVMe drives appear. Click "Load driver" on the drive selection screen and point it to the driver files from your motherboard manufacturer (usually Intel RST for Intel builds or AMD RAID/AHCI for AMD). Put those files on a second USB drive before you start.
What's the difference between Windows 11 Home and Pro for a new build?
For most home users and gamers, Home is sufficient. Pro adds BitLocker full-disk encryption, Remote Desktop hosting, Hyper-V virtualization, and domain join — relevant for work machines or small business builds. Pro also gives you the Domain Join bypass to skip the Microsoft account during OOBE without any commands.
Does Dave's Computers do custom PC builds in New Jersey?
Yes. We build custom PCs at our Somerville NJ shop. Drop off your parts, or talk to us about sourcing. We handle the full build, Windows installation, driver setup, BIOS configuration, and initial tuning. Call (908) 428-9558 or visit our custom PC builds page for details.
Windows won't install — I get a "this PC can't run Windows 11" error. What now?
That error means TPM 2.0 or Secure Boot is not enabled in your BIOS. Go back into BIOS: disable CSM, enable Secure Boot (set to Standard mode), and enable Intel PTT or AMD fTPM. Save and retry. If you're on hardware that genuinely doesn't support TPM 2.0 (pre-2016), you can't run Windows 11 officially — you'd need to stay on Windows 10 or use an unofficial workaround.
My RAM is showing at 2133MHz but it's rated for 6000MHz — what happened?
XMP (Intel) or EXPO (AMD) is not enabled in your BIOS. Your RAM runs at a safe default of 2133MHz until you enable the profile. Go into BIOS → AI Tweaker / D.O.C.P. / AMD Overclocking and enable XMP or EXPO. Save and reboot. Verify the speed in Task Manager → Performance → Memory.
Do you offer in-home PC setup near me in NJ?
No — we're a drop-off shop only at 75 N Bridge St, Somerville NJ 08876. We don't do house calls or on-site visits. Drop off your build and we handle everything in-shop. Most customers are 15–30 minutes away from central NJ locations.
New Customer? Print This and Save $20
First time visiting Dave's Computers? Bring this coupon and take $20 off your labor. Valid at our Somerville, NJ shop.
Off Labor on Your First Repair or Build Setup
Show this coupon at drop-off. Mention code "BUILD20" at the counter or when you call.
Code: BUILD20 · Dave's Computers · 75 N Bridge St, Somerville NJ 08876 · (908) 428-9558
Also Serving These NJ Communities
Customers drive to our Somerville shop from across central New Jersey — typically 15–30 minutes.One location, drop-off only. Dave's Computers has one location at 75 N Bridge St, Somerville NJ 08876. We do not offer on-site or in-home service anywhere in New Jersey. All builds and repairs are performed at our Somerville shop. Customers from surrounding towns drop off their machines and pick them up when ready. Curbside drop-off is available.
Need Help With Your New PC Build?
Drop it off at our Somerville, NJ shop — no appointment needed. We'll handle the Windows install, BIOS configuration, and driver setup. Ready to use when you pick it up.
📞 (908) 428-9558Related Posts
Workstation vs Gaming PC: Which Desktop Is Right for You?
When shopping for a high-performance desktop computer, you’ll likely face a key question: should you go with a workstation or a gaming PC? Both are powerful machines, but they’re designed with different goals in mind. Workstations are built to handle complex professional tasks, while gaming PCs prioritize speed, responsiveness, and visual performance for immersive gaming.At Dave’s Computers, our custom PC build services in New Jersey help customers match their desktop computers to their needs, whether you're editing video, rendering 3D models, or running the latest games. Here's how workstations and gaming PCs differ, and what you should consider before buying.
PC Hardware Differences: How Components Define Performance
The hardware inside your PC determines how well it handles specific tasks. Workstations use components built for stability, multitasking, and professional applications like CAD, data analysis, and video editing. They often feature:- Workstation CPUs with more cores for parallel computing
- ECC RAM (error-correcting code) to reduce the risk of data corruption
- Workstation motherboards designed for stability and long-term performance
- Gaming CPUs with high clock speeds for fast frame rates
- Gaming motherboards that support overclocking
- High-end GPUs for realistic graphics and smooth gameplay
- Advanced cooling systems to manage heat during intense gaming sessions
Use Cases: Professional Workflows vs Gaming Performance
Workstation for Professional Applications
If your daily tasks involve software like AutoCAD, Adobe Premiere, or Blender, a workstation PC is the right fit. These systems are designed for:- Rendering large creative files
- Running multiple heavy applications simultaneously
- Performing complex calculations or simulations
Gaming PC for Entertainment and Everyday Use
Gaming PCs, on the other hand, prioritize gaming performance. They’re built for:- High refresh rate monitors
- Quick load times
- Smooth, responsive controls
Multitasking and Hybrid Needs: When You Need Both From a PC
Some users need a system that performs well across both creative and recreational tasks. Maybe you want to game in the evenings but edit 4K videos during the day. In that case, a hybrid solution might be right. Here’s how to balance your build:- Prioritize a strong multi-core CPU to handle both games and creative software
- Choose ample RAM (32GB or more) to support multitasking
- Consider a GPU that performs well in both gaming and rendering scenarios
Choosing the Right Desktop Computer for You
To choose between a workstation vs gaming PC, start with your main use case. Here's a quick breakdown to help guide your decision:| Use Case | Recommended Build Type |
|---|---|
| CAD, 3D modeling, video editing | Workstation PC |
| Competitive gaming | Gaming PC |
| Streaming and gaming | Gaming PC with multitasking support |
| Data analysis or simulations | Workstation PC |
| Office work + casual gaming | Hybrid desktop |
Why Turn to Dave’s Computers?
Our team in New Jersey builds and configures desktops specifically for:- Workstation performance tailored to your profession
- Gaming hardware selected for maximum enjoyment
- Hybrid builds that combine versatility and reliability
Contact Dave’s Computers Today
Choosing the right desktop doesn’t have to be complicated. Let our team help you find a machine that fits your goals, whether that’s creating content, managing business workflows, or dominating your favorite games. Ready to build or buy your next PC? Contact Dave’s Computers for expert advice and custom solutions tailored to your needs.Related Posts
Enable Game Mode for Faster Performance
One of the simplest ways to get an immediate boost is by enabling Game Mode in Windows. This built-in feature prioritizes your system’s resources by limiting background activity and focusing on your game.How to enable Game Mode:
- Click Start, then Settings
- Navigate to Gaming > Game Mode
- Toggle Game Mode On
Boost FPS and Increase Stability with Smart Adjustments
Getting higher FPS (frames per second) is one of the top goals for any PC gamer. A smoother frame rate doesn’t just make games look better — it also improves your reaction time and overall experience. The good news? You don’t need to overhaul your entire setup. A few smart changes go a long way.Start with these essential steps:
- Update your graphics drivers: Visit the official site for NVIDIA, AMD, or Intel to get the latest version. Updated drivers often include FPS improvements and stability fixes for new games.
- Set your system to High Performance: Go to Settings > System > Power & Sleep > Additional Power Settings and select the High Performance plan.
- Close background apps: Shut down programs running in the background that use up CPU, memory, or disk resources — especially browsers, update tools, and chat apps.
- Use GPU optimization tools: Programs like NVIDIA GeForce Experience or AMD Adrenalin can auto-adjust graphics settings for a better balance between quality and speed.
- Lower shadow quality
- Reduce anti-aliasing
- Turn down texture resolution
Use Hardware-Accelerated GPU Scheduling
Once you’ve tackled the basics, the next step is to unlock even more gaming performance using advanced GPU settings. Hardware-accelerated GPU scheduling lets your graphics card handle memory management directly, reducing latency and improving responsiveness.How to enable GPU scheduling:
- Go to Settings > System > Display
- Scroll down and click Graphics Settings
- Toggle Hardware-accelerated GPU scheduling to On
- Restart your PC for the change to take effect
Lower Your Resolution for Smoother Gameplay
High-resolution displays look amazing, but they put serious strain on your graphics card — especially during intense scenes or multiplayer matches. If your system is lagging or your FPS drops unexpectedly, lowering your resolution may be the fix. Dropping from 4K to 1440p, or from 1080p to 900p, can free up GPU resources and reduce input lag. This adjustment is often enough to get smooth, stable performance without a major hit to visual quality.Combine resolution tweaks with:
- Enabling Game Mode in Windows
- Lowering in-game settings like effects, post-processing, or draw distance
- Turning off unnecessary overlays (Discord, Steam, etc.)
Need Help Optimizing Your Gaming PC?
Keeping a custom PC running at peak performance takes more than one-time tweaks — it takes regular maintenance, driver updates, and the occasional hardware review. If you’ve run through these steps and still aren’t getting the performance you expect, bring it in. We offer in-shop diagnostics ($75, credited toward any repair), hardware upgrades, and hands-on configuration help at our Somerville, NJ location. No appointment needed — drop it off at 75 N Bridge St or call us at (908) 428-9558.Related Posts
Intel vs AMD: Which Is Better for Your Next Build?
Building a new PC means making one of the most important decisions first: choosingbetween Intel and AMD. Whether you're aiming to max out frame rates for gaming or need aprocessor that powers through video editing or multitasking, your CPU choice sets the tonefor your entire build.
At Dave’s Computers custom PC services in NJ, we help customers across New Jersey figure out which processor fits their needs best. With so many options and evolving hardware specs, it can feel overwhelming. That’s why we’ve broken it down in this easy-to-follow guide. We’ll compare Intel and AMD across gaming, productivity, power efficiency, and budget to help you find the right fit for your system, without the jargon or guesswork.
Intel vs AMD: Core Differences Today
Intel and AMD dominate the CPU market, but they take different approaches when it comes
to architecture, compatibility, and upgrade paths. Understanding how these differences
affect your build will help you make a smarter investment, especially if you're choosing
between the Intel Core and AMD Ryzen series.
Intel’s latest Core Ultra 200 Series (Arrow Lake) introduces a hybrid core architecture with enhanced AI performance via integrated NPU, support for DDR5-6400, PCIe 5.0, and built-in Intel Xe-LPG graphics. These chips are designed for modern productivity and AI tasks, offering 24 cores (8P+16E) and seamless integration with Windows 11 Copilot+ features.
AMD counters with the Ryzen 9000 Series, based on the Zen 5 architecture, providing up to 16 cores and 32 threads, higher IPC (instructions per clock), and wider platform stability thanks to ongoing AM5 socket support. Though AMD lacks dedicated NPUs, it delivers exceptional multithreaded performance, ideal for creators, professionals, and power users.
Gaming CPUs: Which Performs Better?
If you're building a gaming PC and want to avoid the most common PC building myths debunked, the CPU you pick plays a big role in frame rates, load times, and overall responsiveness. Both Intel and AMD offer strong options, but their strengths differ depending on your gaming style and whether you also stream, multitask, or plan to upgrade down the road.Intel for Gaming:
Higher single-thread performance for esports titles like Valorant and CS2
Built-in Arc iGPU for entry-level gaming without a discrete GPU
AI-enhanced frame pacing and streaming optimization with Copilot+
AMD for Gaming:
More cores and threads ideal for simultaneous gaming and streaming
Ryzen 9 9950X and 9950X3D offer industry-leading gaming performance
Longer socket support means easier CPU upgrades on AM5 boards
Independent testing shows that Ryzen 9 9950X consistently delivers up to 18% better performance in modern AAA titles than Intel’s Core Ultra 9 285K, especially when paired with high-end GPUs. AMD’s 3D V-Cache variants also offer major advantages in titles like Baldur’s Gate 3 and Horizon: Forbidden West.
Productivity and AI Integration
In 2025, productivity requires more than just raw clock speed. Today’s workloads include AI-assisted tools, remote collaboration, and media editing — and CPUs must keep up.
Intel Core Ultra 200 Series:
Integrated NPU offers up to 13 TOPS for real-time AI tasks (image editing, transcription, video effects)
Hybrid core layout optimizes power use across apps like Photoshop, Office 365, and Zoom
Designed for desktop productivity tasks, with partial AI acceleration but not Copilot+ certified.
AMD Ryzen 9000 Series:
Delivers superior performance in multi-threaded workflows like 4K video rendering, code compilation, and simulation
Still unmatched in raw core power, with 16-core CPUs available even on mid-range boards
AM5 motherboards support ECC memory and extended PCIe 5.0 lanes for demanding workflows
Benchmark Insights:
While Intel leads in AI-specific operations, such as background blur and speech enhancement via NPU, AMD dominates in conventional productivity, outperforming Intel by 20–30% in Blender, Premiere Pro, and DaVinci Resolve workloads.
Budget and Upgrade Path Considerations
Whether you’re building your first PC and want to avoid common mistakes when building a custom PC or refreshing an older system, cost matters. But it’s not just about the sticker price of the CPU, it’s about the entire build. That includes your motherboard, memory, cooling solution, and whether your components will still be compatible for future upgrades.AMD Ryzen 9000 Series:
AM5 socket support since 2022 — backward and forward compatibility confirmed through at least 2026
Offers better value per core and unlocked performance on budget chipsets (e.g., B650)
Great for users upgrading from Ryzen 7000 or 8000 without needing a new board
Intel Core Ultra 200 Series:
New LGA 1851 socket requires entirely new motherboards and BIOS support
Supports cutting-edge features: Wi-Fi 7, Thunderbolt 4, and higher DDR5 speeds
Ideal for fresh builds focused on AI workloads, power efficiency, and mobility
Cost Comparison:
For a performance-class build, AMD’s total platform cost (CPU + board + RAM) is typically 10–15% lower, especially if reusing an AM5 board. However, Intel delivers added value through its AI integrations and laptop-class battery efficiency, especially in ultrabooks and small form factor builds.
Thermal Efficiency and Power Consumption
Thermal design and power efficiency are now major differentiators in the high-performance CPU market.
AMD's Ryzen 9000 Series maintains a strong lead in performance-per-watt, especially in multi-core rendering and video workloads. TDPs range from 65W to 170W across the lineup.
Intel’s Core Ultra 200 Series uses a hybrid core layout to manage power intelligently, especially in mobile systems — but desktop SKUs often run hotter under sustained load.
Cooler Requirements:
AMD chips tend to work well with standard air coolers, while top-end Intel chips may require 240mm+ AIO cooling for peak stability.
Real-World Recommendations
Choose Intel if:
You need access to the latest ports and features like Thunderbolt 4 and Wi-Fi 7
You want integrated graphics for office tasks or light workloads without a GPU
You’re building a general-purpose system for productivity, web, and basic AI tasks
You use software that benefits from a built-in NPU, like video calls with background blur
You want smooth multitasking with Intel’s hybrid P-core and E-core architecture
You’re building from scratch and prefer a platform with cutting-edge I/O support
Choose AMD if:
You want the best gaming performance, especially with a dedicated GPU
You need strong multi-threaded power for video editing, rendering, or 3D workloads
You plan to use high-speed DDR5 memory (up to 8000+ MT/s with overclocking)
You value long-term socket support with the AM5 platform for future upgrades
You prefer air or mid-range liquid cooling without thermal issues
You want the best price-to-performance ratio for the full platform (CPU, board, RAM)
What Is Ryzen AI?
Note: The following sections describe laptop-only CPUs and are not relevant for desktop builds.With growing demand for AI acceleration, AMD released the Ryzen AI 300 Series (not to be confused with desktop Ryzen 9000). These new laptop chips, based on Strix Point, integrate:
A dedicated XDNA 2 NPU with 50+ TOPS of AI compute
12 Zen 5 CPU cores
Integrated RDNA 3.5 GPU
This platform is AMD’s answer to Intel’s Lunar Lake for laptops — and a key milestone for upcoming Ryzen AI for desktop, which is expected in 2026.
Intel AI Processors in 2025
Intel now offers multiple AI-ready laptop chips, not desktop CPUs with Copilot+ support:
Core Ultra (Meteor Lake) – Laptops, Gen 1 NPU
Core Ultra 200 (Arrow Lake) – Desktops, Gen 1 NPU
Lunar Lake (Coming late 2025) – Laptops, Gen 2 NPU
If you want a future-proof AI desktop today — Intel Arrow Lake is your best option. For laptops, Lunar Lake will likely dominate in the second half of 2025.
Looking Ahead: The Future of AI in CPUs
By the end of 2025, both Intel and AMD are expected to offer AI-capable chips across both desktops and laptops.
Intel’s roadmap confirms Lunar Lake and Panther Lake with advanced AI performance
AMD is expected to launch Ryzen AI 9000 for desktops with NPUs
Windows 12 (or major 11 updates) will likely push real-time AI features even further — meaning future CPUs must handle these tasks locally.
At Dave’s Computers, we’re here to help you choose with confidence. Whether you’re building your first gaming rig or upgrading a work setup, our local team can match you with the right CPU for your goals. Reach out today or stop by our New Jersey shop. We’ll make sure your next build runs fast, cool, and exactly how you want it.
Related Posts
Mistakes to Avoid When Building a Custom PC: Common Mistakes Beginners Make During PC Assembly
There are many mistakes to avoid when building a custom PC, especially if you're new to the process. Even small errors can lead to major issues like hardware damage, compatibility conflicts, or a system that won’t boot. At Dave’s Computers, we’ve helped countless customers through their first custom PC build NJ, and we know where things typically go wrong. That’s why we created this checklist to help you plan smarter, avoid costly setbacks, and build a PC that performs the way it should.
Skipping the Motherboard Manual
Many beginners ignore the motherboard manual, assuming it’s unnecessary. But this simple booklet contains the layout, slot configurations, and installation details you need to avoid building errors.What can go wrong:
- Installing RAM in the wrong slots, missing dual-channel benefits
- Plugging cables into incorrect headers
- Bending or damaging CPU socket pins
What to do instead:
- Keep your motherboard manual open during assembly
- Use it to identify proper RAM slots, front panel connectors, and storage headers
- Double-check the CPU socket layout before installation
Forgetting the Motherboard Standoff
Installing a motherboard without standoffs is a common and costly mistake. These small metal spacers keep your board from shorting out by lifting it off the metal case.Why this matters:
- No standoffs = direct contact = potential short circuit
- Incorrect placement can warp or crack the board
Tips:
- Install only the standoffs that match the mounting holes on your motherboard
- Don’t overtighten the screws
- Check alignment carefully before securing the board
Overlooking Incompatible Parts
Selecting components that don’t work together is one of the biggest mistakes to avoid when building a custom PC. Just because parts are high-end doesn’t mean they’ll work together.Common compatibility problems:
- CPU and motherboard socket mismatch
- RAM not supported by the motherboard
- Power supply wattage too low for GPU or CPU
- Graphics card too large for the case
- Storage drives incompatible with available ports
Avoid the hassle by:
- Using part-matching tools like PCPartPicker
- Verifying power requirements for all hardware
- Checking form factors to ensure your case fits your motherboard and GPU
Poor Cable Management and Loose Connections
Rushed cable management can cause airflow issues, overheating, or even boot failures.Red flags:
- Loose GPU or power connectors
- Overcrowded cables blocking fans
- Unconnected case I/O cables (like power switch or USB headers)
Best practices:
Route cables behind the motherboard tray where possible Use zip ties or Velcro straps to secure cables Test power connections to CPU, GPU, SSD, and motherboard before turning the system on A tidy case doesn’t just look better—it runs better too.Misapplying Thermal Paste
Thermal paste helps your CPU cooler transfer heat away from the processor. Getting it wrong can cause overheating and system instability.Common thermal paste mistakes:
- Applying too much or too little
- Using old or dried-out paste
- Forgetting to apply it at all
How to get it right:
- Apply a pea-sized drop in the center of the CPU
- Do not spread it manually—let the cooler pressure handle distribution
- Clean off old paste with isopropyl alcohol before reapplying
Not Installing Drivers Before First Boot
You’ve built your PC, made all the right choices intel vs amd which is better for your next build, powered it on — and it’s not detecting your storage or Wi-Fi. Missing drivers are often the cause.What to prepare before booting:
- USB drive with Windows installation files
- Motherboard drivers (especially chipset, network, and storage)
- GPU drivers (from the manufacturer’s website)
Pro tip:
- After installing Windows, run updates and install all necessary drivers
- Don’t rely solely on Windows Update for everything—it might miss essential ones
Rushing the Assembly Process
Trying to build everything in one sitting without a plan often leads to mistakes.What happens when you rush:
- Forgetting components (like SSDs or CPU coolers)
- Misplacing screws or cables
- Damaging fragile pins or parts
How to build smarter:
- Organize your parts on a clean, static-free surface
- Follow a step-by-step plan: start with CPU and RAM, then motherboard, then GPU,
- storage, power supply, and finally cables
- Test components outside the case (called "breadboarding") if you're unsure
When to Ask for Help
DIY doesn’t mean you have to go it alone. If something feels off, strange noises, no display, overheating, don’t push forward without checking. At Dave’s Computers, we’re happy to help troubleshoot your custom PC in-store or over the phone.Reach out if you:
- Hear fans spin but get no display
- Can’t install Windows or drivers
- Need help updating BIOS or firmware
- Aren’t sure which parts to choose
Ready to Build with Confidence?
Avoid the most common mistakes beginners make when building a custom PC by planning ahead, checking compatibility, and asking for help when needed. Whether you're building from scratch or upgrading your setup, Dave’s Computers is here to support your DIY journey. Contact us today for expert advice or drop by our store for hands-on help with your custom PC build.Related Posts
Air vs Liquid Cooling for Custom PC: Choosing Between Air Cooling and Liquid Cooling for Gaming Performance
When building a custom gaming PC custom pc build NJ, choosing between air and liquid cooling has a big impact on performance, noise, and longevity. Each cooling system has its strengths, and the right choice depends on your hardware setup, budget, and gaming goals. Whether you're focused on frame rates, quiet operation, or aesthetics, understanding the pros and cons of air vs liquid cooling for custom pc setups helps you make the right call. At Dave’s Computers, we break it down to help you find the best cooling solution for your next build. No guesswork, just reliable advice tailored to your needs.
Why Cooling Matters for Custom Gaming PCs
Gaming PCs mistakes to avoid when building a custom pc run hot, especially under load. Modern CPUs and GPUs can reach high temperatures during extended gaming sessions. Without a reliable cooling system, that heat can slow down performance, cause crashes, or even damage components over time.
Effective cooling keeps your system stable and responsive. It helps prevent thermal throttling, where the CPU or GPU slows down to avoid overheating. Whether you're playing graphically intense games or multitasking with heavy applications, your cooler plays a big role in how smooth your experience feels.
Air Cooling: Affordable and Straightforward
Air coolers are the go-to choice for many gamers, and for good reason. These systems use a heatsink and one or more fans to move heat away from the CPU and out of the case.Benefits of air cooling:
- Cost-effective: Great performance for a lower price.
- Simple installation: No need to deal with tubes or pumps.
- Reliable: Fewer parts mean fewer things that can go wrong.
- Low maintenance: Just keep the fans and heatsink free of dust.
Liquid Cooling: Performance and Visual Appeal
Liquid cooling uses water or coolant to move heat away from the CPU. The heat travelsthrough tubes to a radiator, where fans push it out of the system. This type of cooling is known for both performance and aesthetics.Why choose liquid cooling:
- Lower temperatures: Ideal for overclocking or high-performance builds.
- Quieter operation: Radiators and larger fans often run more quietly.
- Better heat distribution: Great for cooling more than one component.
- Clean look: All-in-one (AIO) liquid coolers offer sleek design options
Custom Watercooling: Maximum Control, Maximum Impact
For serious builders, custom watercooling systems offer total control over thermal performance and style. Unlike AIO units, these setups are fully modular. Users choose their own pumps, radiators, reservoirs, and blocks.Advantages of custom watercooling:
- Targeted cooling: Cool multiple components at once.
- Ultra-low noise: Larger radiators mean fans don’t need to work as hard.
- Extreme performance: Keeps temperatures in check during overclocking.
- Standout aesthetics: A clear case with glowing coolant turns heads.
How to Choose the Right Cooler for Your Build
Choosing between air and liquid cooling isn’t just about looks. Your decision affects system performance, upgrade flexibility, and long-term reliability. Here’s what to weigh when picking the best cooler for your custom PC how to install windows on a new pc build.
1. Performance Requirements
If your build includes a high-wattage CPU, powerful GPU, or you plan to overclock, liquid cooling might be the better fit. It handles thermal loads more efficiently, helping components perform at their best. On the other hand, if you're gaming at 1080p or not pushing your hardware to its limits, a high-quality air cooler can manage heat just fine.
2. Case Compatibility
Some mid-tower and mini-ITX cases can’t accommodate large air coolers or triple-fan radiators. Always check clearance specs before choosing. Liquid coolers, especially AIOs, often fit into tighter spaces but still require radiator mount points.
3. Noise and Aesthetics
Air coolers can get noisy under load. Liquid systems often run quieter and give a cleaner look, especially those with RGB or colored coolant for extra style.
4. Maintenance and Longevity
Air coolers need occasional dusting. Liquid coolers need pump checks and, in custom loops, coolant changes. If you want set-it-and-forget-it, air cooling is easier to live with.
At Dave’s Computers, we can walk you through all of these factors and help you find the ideal solution, whether it’s an ultra-quiet air cooler or a high-performance liquid system that keeps your PC cool under pressure.
Related Posts
Most Common PC Building Myths Debunked: Busting the Top Myths About Building Your Own PC
Busting Myths: Building Your Own PC Isn’t Just for Experts
There’s a persistent myth circulating in the world of computers—that building your own PC is
something only seasoned experts can handle. At Dave’s Computers, we’ve seen how this
myth keeps countless individuals and even companies from enjoying the benefits that come
with custom-built pcs. Let’s tackle some of the most prevalent pc-building myths head-on
and show why anyone motivated can successfully complete their own build.
One prevalent building myth is that the process requires advanced technical knowledge. In reality, modern pcs are designed with user-friendliness in mind. The way components slot together—motherboards, memory, graphics cards, and storage drives—makes building accessible even to first-timers. Instruction manuals, step-by-step online guides, and a supportive community further make pc building approachable for non-experts. And if you ever feel stuck, Dave’s Computers offers remote help and in-person support for both individuals and businesses, so you’re never left alone with a stubborn myth or hardware hiccup.
Another common myth is that attempting a build on your own could somehow ruin all your components. This false belief is mostly rooted in outdated experiences. Today’s pc parts are built with plenty of safeguards, and as long as you take basic precautions—discharging static, consulting reputable resources, and working methodically—building your own computers is both safe and rewarding. Plus, any build can be double-checked or even repaired by pros at Dave’s Computers. Our responsive team is happy to answer questions or troubleshoot issues that come up during your build. We work to debunk the myth that if your build doesn’t work right away, there’s no hope.
Many also worry that building is more expensive than buying prebuilt pcs. However, one of the enduring myths is that costs spiral out of control for beginners. The truth is, pc building lets you pick only the features you need, avoiding wasted money on extras. It’s far from the false claim that all builds require high-end, complex setups. From basic office computers to robust gaming pcs, custom builds can suit any budget and workload. At Dave’s Computers, our IT consulting helps you balance quality and price, matching your needs without falling for any misleading myth about costs.
If you’re ready to challenge these pervasive pc-building myths, remember: building isn’t reserved for the elite—anyone can do it. And with Dave’s Computers as your partner, every myth turns into an opportunity to learn, save, and enjoy a computer tailored for you. Need guidance? Reach out for personalized support or explore our custom PC build services in New Jersey to get started.
Do You Really Need a High Wattage PSU for Every Build?
One of the most common psu myths in the world of pc building is the belief that every system needs an extremely high wattage psu, regardless of its actual power requirements. At Dave’s Computers, we want both companies and individuals in New Jersey to know that this myth is responsible for unnecessary costs and inefficiencies in many builds. The truth is, your computer’s power supply should be tailored to your hardware, not selected based on a "more is always better" mentality.
Let’s break it down: your pc’s power supply unit (psu) is only one part of the hardware ecosystem. Its job is to provide stable, reliable power to all components, from processors to graphics cards. However, installing the highest wattage psu you can find doesn’t mean better performance or safer components—it could even be less efficient. Modern psus operate most efficiently at around 50–80% load. If you massively oversize your psu compared to actual power needs, you might not only waste electricity but also see lower efficiency from your hardware.
Another point to consider is that reputable psus today are built to deliver strong performance at their rated wattage and can handle momentary power spikes. For businesses relying on stability, choosing a reputable psu with good efficiency ratings is a smarter investment than chasing maximum wattage. The hardware you actually install—such as your cpu, gpu, memory, and storage—determines your real power needs. Tools and online calculators allow you to add up the wattage required by your components, making it easy to choose the right psu without guesswork.
At Dave’s Computers, we see many users—both individuals and companies—ask if they need 850 watts or more for basic office or home systems. In reality, most mid-range builds function optimally with PSUs in the 450 to 650 watt range, provided they’re from reputable brands and deliver consistent, clean power. It’s far more important to focus on psu efficiency (look for the 80 PLUS rating) and strong performance under load, rather than simply opting for the highest wattage available. Our shop and IT support team are happy to help you select the right psu for your specific hardware, ensuring safety, performance, and power efficiency.
If you’re unsure about your power requirements, let us take out the guesswork—contact Dave’s Computers for professional advice, component selection, or a hardware review. Don’t let persistent psu myths drive up your costs or compromise your build’s performance; get clarity and the best value with our experienced team by your side.
Liquid Cooling: Debunking the Myth of High-Maintenance Setups
When it comes to cpu cooling for your custom PC, liquid cooling often gets a reputation for being far more high-maintenance than it actually is. At Dave’s Computers, we regularly help both gaming pc enthusiasts and everyday users in New Jersey see past the myths that might steer them away from this impressive option. The prevailing myth paints liquid cooling as a daunting tangle of components and potential risk, but let’s break down why modern systems are much more accessible—and why they might be right for your next build.
First off, most liquid cooling setups today are designed with convenience in mind. Unlike the complex, leak-prone hardware of the past, today’s all-in-one liquid cooling solutions are fully sealed, reliable, and remarkably easy to install. For anyone intent on boosting their cpu performance—whether for gaming pc builds, demanding office tasks, or workstation-level workloads—these cooling solutions offer efficient temperature control without constant upkeep. The old myth that you’ll be tinkering with your system every month just doesn’t reflect the advances in cooling hardware and the quality assurance offered by reputable brands.
The benefit for those building a gaming pc is clear: liquid cooling leads to lower temperatures under heavy loads, helps unlock more sustained performance, and can also minimize system noise. While some people worry that these setups require frequent maintenance, in reality, most users only need to do a simple dust check along with routine care for their other components. There’s no need to open, refill, or troubleshoot your liquid cooling system constantly when you choose a quality product—just as with air cpu cooling, proper setup and the right hardware selection make all the difference. That’s what we aim to guide you through at Dave’s Computers, ensuring every component in your gaming pc or workstation runs seamlessly.
Still not sure if liquid cooling is right for your custom rig? At Dave’s Computers, we love helping both companies and individuals weigh their options, taking all the guesswork (and myths) out of the equation. Our team can help you choose, install, and maintain top-tier cpu cooling systems—liquid or air—keeping your performance at its best. Don’t let the myth of high-maintenance setups scare you away. Contact us today or stop by our New Jersey shop to find the optimal solution for your system’s cpu, components, and gaming or business performance needs.
Windows Installation Worries: Separating Fact from Fiction
When it comes to pc-building myths, few are as prevalent and persistent as those surrounding windows installation. Many individuals—whether they’re building their first computers or managing IT for a company—feel a sense of dread at the prospect of installing windows on new hardware. The myth is that this stage in the building process is fraught with risk, complexity, and potential for irreversible errors that could ruin the performance of your brand-new pc. At Dave’s Computers, we’re here to clarify these myths, so you can move forward with confidence in your next build.
One false impression we often encounter is that windows installation is overly complicated and can easily lead to incompatible components or bricked pcs. In reality, modern installation processes are highly streamlined. Installation media detects compatible hardware, walks users through intuitive setup steps, and offers troubleshooting tools for most common hiccups. Most performance issues that follow a windows installation are not due to the OS itself, but are the result of either missing drivers or improper hardware configuration—a problem that’s easily solved with the right support. At Dave’s Computers, we help both novice and advanced users sort out driver downloads, activation processes, and bios settings to ensure everything is correctly tuned for optimal performance.
Another myth claims that installing or re-installing windows can somehow void warranties on components. This is simply not true for reputable hardware brands; your manufacturer’s warranty isn’t compromised just because you choose to refresh your operating system. In fact, reinstalling windows can actually help with troubleshooting stubborn performance issues, giving your pc a clean slate. We recommend companies and individuals alike consider a fresh windows install as a powerful tool in their troubleshooting toolkit, not something to avoid because of misinformation or prevalent pc myths.
For those worried about choosing between various windows versions, rest assured that for the majority of users—whether for gaming, business, or personal use—the current release versions are extensively tested for broad compatibility across pcs and a wide spectrum of components. Our team at Dave’s Computers regularly consults with clients about which version is best for specific use cases to ensure you get the performance and features you need. And if you ever feel stuck, our local New Jersey experts can provide remote installation support or walk you through each step, taking the stress out of the process. Ready to bust the myths around windows and pc builds? Contact Dave’s Computers for real answers, professional advice, and hands-on help from a team that’s seen every building myth in the book.
Myths About RAM: Is More Always Better for Your PC?
RAM is arguably one of the most discussed components in the world of building computers, and unsurprisingly, it’s also surrounded by persistent myths. One of the most prevalent misconceptions is that simply adding more RAM automatically guarantees massive performance improvements—especially for gaming pc builds or high-end workstations. At Dave’s Computers, we help New Jersey companies and individuals cut through this myth to see how RAM truly influences hardware performance, ensuring better choices for both budgets and builds.
Let’s break down why the “more is better” myth just doesn’t hold water for all pcs. RAM certainly plays a vital role in system responsiveness, multitasking, and smooth workflow execution. But there’s a point where installing additional RAM offers little to no real-world gain. For most modern computers—whether business machines or gaming pcs—pairing the right amount of RAM with balanced hardware is more important than maxing out capacity. If your gaming pc or office desktop already has enough RAM to meet its typical workload, adding more won’t improve frame rates, application speeds, or general performance. Excess RAM simply sits unused, a wasted investment. This myth is especially false when software or games you use don’t require or utilize massive RAM reserves.
Performance relies on hardware harmony: RAM, CPUs, storage, and motherboard all interacting efficiently. For gaming pcs, for example, the jump from 8GB to 16GB of RAM may offer a noticeable benefit, but beyond 16GB or 32GB, the difference in gaming performance often plateaus—unless you’re using your pc for memory-intensive tasks like video production or virtualization. Similarly, business pcs benefit more from balancing RAM with other components than indiscriminately expanding it. It’s a prevalent mistake—driven by persistent myths—to focus only on one aspect of a system and overlook how tightly integrated performance truly is.
Another common misunderstanding stems from confusing RAM with other essential components. Many assume RAM upgrades will fix all performance bottlenecks in gaming pcs or productivity systems. But the reality is that CPUs, graphics cards, and storage speeds might be more limiting factors. This singular focus on RAM is a myth we see often at Dave’s Computers—especially with first-time builders seduced by exaggerated advertising or outdated advice.
If you’re unsure how much RAM is right for your build, don’t fall for the false promises or the prevalent notion that “more is always better.” Reach out to the professionals at Dave’s Computers. We’ll analyze your hardware setup, actual use case, and recommend the optimal RAM amount—whether you’re building a gaming pc, a business computer, or upgrading your office pcs. Stop guessing and start building for real performance with expert guidance, honest advice, and ongoing support from a trusted New Jersey team. Let us help you banish old RAM myths for good and get the most out of your next build.
Are High-End PC Components Always Necessary?
One persistent misconception we see at Dave’s Computers is the idea that you need the absolute highest-end components in order to build a capable computer—especially for tasks like gaming, creative work, or even day-to-day business functions. The truth is, premium graphics cards, top-tier CPUs, and the latest GPUs certainly have their place, but they’re not always required to achieve great performance. In fact, building a balanced system with the right hardware for your needs is often much smarter, both technically and financially.
A widely-held myth suggests that only the newest, most expensive graphics cards or CPUs can deliver excellent performance in a gaming pc or workstation. However, today’s midrange GPUs and CPUs provide superb real-world results for most users. Unless you’re targeting ultra-high frame rates on a 4K monitor or engaging in demanding tasks like 3D rendering, a moderate graphics card, a solid mid-tier CPU, and reliable components can handle the majority of workloads with ease. At Dave’s Computers, we regularly help New Jersey companies and individuals choose hardware that’s tailored to specific needs, ensuring no one overspends chasing unnecessary performance gains.
Your components should fit your use case. If you’re building a gaming pc for eSports or mainstream titles, you’ll see stellar results from a GPU and CPU combo that fits within your budget, rather than splurging on halo products. Similarly, for office productivity or remote work, integrated graphics or entry-level graphics cards are more than capable. What’s really important is matching your hardware with your actual requirements. Overbuying components doesn’t boost performance for everyday computing—often, it just leads to higher upfront costs, greater power consumption, and reduced value.
At Dave’s Computers, we believe your hardware should maximize both performance and efficiency. We guide our customers through the complex world of graphics cards, GPUs, CPUs, and supporting components, showing how to achieve the best gaming pc or business machine for every price point. Our experts help you avoid wasting money on unnecessary upgrades, while making sure your computer is equipped to tackle your favorite games, creative projects, or business tasks. If you’re still unsure what’s right for your next build, let us analyze your workflow, recommend the ideal hardware, and provide hands-on support. Choose Dave’s Computers for honest advice, careful hardware selection, and a gaming pc or workstation truly built around you—no myths, just results.
Related Posts
How to Prevent Laptop Boot Issues: Troubleshooting Start Problems and Practical Fixes
Laptop boot issues can stop your day before it starts. Whether you're trying to join a meeting or finish work, that frozen screen or error message can throw off your schedule fast. At Dave’s Computers in New Jersey, we’ve helped hundreds of people fix frustrating startup failures, often with simple checks that most users overlook.This guide breaks down how to prevent laptop boot issues and offers straightforward steps to fix and prevent them.

Common Reasons Laptops Fail to Start
Boot issues can come out of nowhere. One day your laptop works fine, and the next it refuses to power on or gets stuck on a loading screen. Often, the root cause isn’t complex hardware failure, it’s something small and easy to fix.Some of the most common causes of laptop boot issues include hardware conflicts and drive-related failures. As explained in our guide on how to extend laptop hard drive life, storage problems often go unnoticed until it's too late:
-
Boot order errors in BIOS
-
Conflicts from external USB devices
-
Faulty or drained batteries
-
Damaged power adapters
-
Failing hard drives or corrupted boot sectors
Disconnect External Devices Before Starting
Many boot failures come from external devices confusing your system. USB drives, hard drives, or even adapters can interfere with how your laptop boots. If your computer tries to start from a flash drive instead of your internal storage, it might stall or freeze.What You Can Do:
- Unplug all external USB devices before you start your laptop.
- Only keep essential hardware connected.
- Check your BIOS boot order (more on that below) to make sure the internal drive is listed first.
- If you still get an error, test each external device one at a time to rule out a faulty item.
Always Check the Power Source First
One of the most overlooked causes of a non-booting laptop is the power source. It’s easy to assume something major is wrong when the screen stays black, but sometimes it’s just a bad adapter or dead battery.Troubleshooting Power Issues:
- Make sure the power cable is firmly plugged in.
- Try a different outlet.
- Inspect the charger for damage.
- Listen for startup sounds like fans or drives spinning.
- Try holding the power button for 10 seconds to force a reset.
- If the battery is removable, try starting with just the adapter—or just the battery—to
- narrow it down.
Check and Update BIOS Settings
If your laptop powers on but won’t reach the operating system, your BIOS settings could be the culprit. BIOS controls how your system starts and which device it boots from first. If your internal drive isn’t prioritized, your system may try to boot from an empty or faulty drive.Steps to Fix BIOS-Related Boot Problems:
1.Restart your laptop and press the BIOS key (often F2, Del, or Esc). 2. Navigate to the boot order or boot priority menu. 3. Move your main hard drive or SSD to the top of the list. 4. Save changes and exit BIOS. For newer systems with UEFI, the steps may vary slightly. Look for settings related to boot mode, legacy support, or secure boot.Consider a BIOS Update:
If your BIOS is outdated, it may not work well with newer hardware or updated storage drives. Manufacturers often release updates that fix bugs or improve system stability. Follow official instructions or consult our team at Dave’s Computers for help with the process.Look Out for Failing Drives
When your laptop starts but can't load Windows, the issue might be with your storage drive. A corrupted hard drive or SSD can prevent your system from locating the files it needs to boot.Warning Signs:
- Frequent freezing at startup
- "No boot device found" messages
- Clicking sounds from the hard drive
- Blue screen errors after loading
Use Windows Recovery Options
If your laptop starts but gets stuck during Windows loading, try using built-in recovery tools. These options can fix corrupt files, repair the bootloader, or roll back recent updates.Windows Recovery Tools:
- Startup Repair – Attempts to fix problems that prevent Windows from booting.
- System Restore – Rolls back your system to a previous working state.
- Command Prompt – Useful for advanced users to run bootrec commands.
- Reset This PC – Reinstalls Windows while keeping or removing your files.
Prevent Future Boot Problems
Fixing your current issue is important, but preventing the next one matters even more. Use these tips to avoid repeat startup failures:- Update BIOS and Windows regularly to stay protected against bugs and compatibility issues.
- Back up your data in case your drive fails.
- Keep your laptop clean—dust can lead to overheating, which damages components.
- Avoid sudden shutdowns or forcing power-offs.
- Invest in a surge protector to shield your laptop from power spikes.
Need Help? Dave’s Computers Is Here for You
Laptop won’t start? Don’t panic. Whether it’s a power issue, BIOS misconfiguration, or failing hard drive, the experts at Dave’s Computers can help you troubleshoot quickly and get back online fast. We offer:- Same-day diagnostics
- Power and boot repairs
- Data recovery services
- BIOS updates and settings optimization
- Remote and in-store support
Related Posts
How to Extend Laptop Hard Drive Life
A laptop’s hard drive is one of its most important components. It stores your files, your system, and everything you need to stay productive. But like any mechanical part, hard drives wear out over time. Luckily, a few simple habits can help you extend its lifespan. Whether you use your laptop for school, work, or personal use, getting expert laptop repair in New Jersey can help you protect your drive and avoid unexpected failures. Let’s look at how to extend laptop hard drive life and keep your device running smoothly.
What Damages a Laptop’s Hard Drive?
Hard drives don’t last forever. They’re sensitive to wear, heat, movement, and power problems. Here are some of the most common things that can shorten a hard drive’s life:Here are some of the most common things that can shorten a hard drive’s life. One of the most overlooked factors is poor temperature control — as how cooling affects laptop efficiency clearly shows, blocked vents and overheating can have serious consequences:
-
Power surges and improper shutdowns
-
Overheating due to blocked vents or dust buildup
-
Bumps or drops while the laptop is running
-
Running too many background apps
-
Old age — especially for mechanical HDDs
Use a Surge Protector and Smart Power Settings
Power surges are a common reason for drive failure. A sudden spike in voltage can damagethe internal parts of your hard drive. This risk increases when you're charging your laptop inplaces with unstable power.Use a surge protector any time you plug in. If you work remotely or travel often, invest in aportable power strip with surge protection.Avoid leaving your laptop plugged in 24/7. Instead, unplug it once it's charged. This reduceswear on the drive and the battery.Set your laptop’s power settings to turn off the hard drive when idle. On Windows, you cando this in the “Power Options” settings. It reduces wear and keeps the drive cooler.Keep Your Software Clean and Your System Healthy
Hard drives don’t just fail from physical issues. Digital clutter matters too. Running too manyapps or letting files pile up puts stress on your drive. Here are some simple habits to keep your system clean:- Uninstall programs you don’t use
- Delete duplicate and unnecessary files
- Use tools like Disk Cleanup or CCleaner
- Run defragmentation (for HDDs only, not SSDs)
Store Files on External Drives
The more you store on your laptop, the more your hard drive has to work. That adds up overtime. Offloading files to an external hard drive is one of the best ways to reduce daily wear. Use an external HDD to store large files like photos, videos, and backups. This helps free up space and lowers the workload on your internal drive — and if something ever goes wrong, knowing how to recover data from a hacked laptop can make all the difference. Backups are not just for emergencies. They also act as off-site storage that reduces the riskof losing everything if your hard drive fails. Cloud storage is another option, but externaldrives are often faster and more secure. Make a habit of backing up weekly, if not daily. Many apps automate this process for you.Avoid Heat and Physical Stress to Protect Your Hard Drive
Heat is one of the biggest enemies of any hard drive. Excessive heat can warp parts andreduce performance over time. Keep your laptop on a hard surface so air can flow underneath. Avoid using it on blankets orbeds. Clean the vents regularly to remove dust and debris. Consider using a cooling pad if you notice your laptop gets warm often. Also, be careful when moving your laptop. Sudden bumps or drops, especially when thedrive is active, can cause damage. Store your laptop in a padded case when not in use. If you're traveling, shut it downcompletely instead of using sleep mode. This helps protect the disk drives from beingdamaged while spinning.Be Proactive with Maintenance and Monitoring
Just like a car needs tune-ups, so does your laptop. Use tools like CrystalDiskInfo or Hard Disk Sentinel to check the health of your drive.These tools let you monitor temperature, read/write errors, and other warning signs. Set reminders to clean up files, run security scans, and check storage health each month. Itdoesn’t take long and can help you catch problems early. The sooner you act, the better your chances of preventing failure.Build Better Habits for Long-Term Use
You don’t need to be an expert to keep your laptop hard drive healthy. Just following a fewhabits can go a long way:- Use surge protection
- Back up to an external hard drive
- Clean up files regularly
- Avoid heat and drops
- Monitor your drive’s health
Need Help? Dave’s Computers Has You Covered
If your laptop’s hard drive is acting up or you just want expert help to keep it running longer,Dave’s Computers is here for you. We offer professional laptop repair, hard drive replacement, and data recovery services,whether you're dealing with slow performance, system errors, or total failure. Located in New Jersey, we provide fast, local service you can trust. Bring your laptop in orcall us for support. Our team will help you protect your data and extend the life of yourdevice. Let us handle the repairs, so you can stay focused on what matters.Related Posts
How Cooling Affects Laptop Efficiency: Why Temperature Management Matters
Why Heat Is the #1 Enemy of Laptop Performance
Modern laptop processors are incredibly capable — but they're also packed into tight, thin chassis with very little airflow. When temperatures climb, your CPU and GPU don't just get hot. They actively protect themselves by slowing down, a process called thermal throttling. Your laptop deliberately cuts its own performance to avoid damage.
The result? Tasks that used to feel instant start lagging. Video calls stutter. Games drop frames. Even basic web browsing feels sluggish — and most people blame the software when it's really a hardware temperature problem.
What "Normal" Laptop Temperatures Look Like
Not all heat is bad. Here's a general reference for laptop CPU temperatures under different conditions:
If your laptop is regularly hitting 90°C or above during normal use — not heavy gaming, just everyday tasks — something is wrong and it needs attention.
The Most Common Causes of Laptop Overheating in NJ
-
1Clogged vents and dust buildup Dust accumulates on the heatsink fins and fan blades over time, blocking airflow almost completely. This is the single most common cause of overheating we see — especially in laptops that are 2–4 years old.
-
2Dried-out thermal paste The thermal paste between your CPU and heatsink dries out and cracks over time, creating gaps that trap heat instead of conducting it away. Replacing it can drop temps by 15–25°C in older machines.
-
3Failing or worn-out fan A fan that's running slowly — or grinding, clicking, or not spinning at all — can't move enough air to cool the components. A failing fan usually announces itself with noise before it fails completely.
-
4Blocked bottom vents from soft surfaces Using your laptop on a bed, couch, or pillow covers the intake vents entirely. Always use on a hard, flat surface — or invest in a laptop stand with a built-in fan for better airflow.
-
5Background processes taxing the CPU Malware, bloatware, or runaway background apps can pin your CPU at 80–100% usage even when you're not doing anything — generating constant heat with no productive work to show for it.
What Sustained Overheating Actually Does to Your Laptop
Heat doesn't just slow your laptop down — it kills it slowly. Repeated thermal cycles expand and contract solder joints, degrade capacitors, and accelerate wear on the storage drive. We've seen laptops in New Jersey that have lost years off their lifespan simply from running hot for too long without a cleaning.
The battery is especially vulnerable. Lithium-ion cells degrade significantly faster at high temperatures. If your battery life has dropped dramatically, overheating may be a contributing factor — not just age.
If you're noticing any of these symptoms and you're searching for a laptop repair shop near you in New Jersey, you don't have to go far. We handle overheating, thermal paste replacement, fan replacement, and full cleaning services at our Somerville location — serving customers from across Somerset, Middlesex, Hunterdon, and Mercer counties.
Is Your Laptop Running Hot? Bring It In.
We'll clean the vents, replace the thermal paste, and test temperatures before and after — so you can see exactly how much of a difference it makes. Serving NJ customers from Somerville since 2011.
Schedule a Drop-Off Call 908-428-9558What You Can Do at Home
Not every fix requires a trip to the shop. Here are a few things you can try on your own first:
Use a hard, flat surface. Keep the bottom vents clear. A $20 laptop stand makes a noticeable difference. Check Task Manager. On Windows, press Ctrl+Shift+Esc and look at CPU usage. If something is pegged at high usage when you're not doing anything, that's your culprit. Blow out the vents. A can of compressed air aimed at the exhaust vents can dislodge loose dust. Note: this pushes dust deeper into the heatsink fins, so it's a temporary measure — not a substitute for a proper internal cleaning.
If those steps don't bring temperatures down, the fix is internal. Opening a laptop to clean the heatsink and replace thermal paste requires the right tools and experience — done wrong, you can damage the motherboard, strip screws, or crack display cables. Our computer repair team in New Jersey does this every day and can have most laptops turned around quickly.
Frequently Asked Questions
Related Services at Dave's Computers
Stop Letting Heat Slow You Down
If your laptop is running hot, throttling, or shutting down unexpectedly, bring it to Dave's Computers in Somerville, NJ. We'll diagnose the issue, clean it out, and get it running cool again — fast. Serving all of New Jersey since 2011. Walk-ins welcome.
Drop It Off Today Call 908-428-9558Dave's Computers · 75 N Bridge St, Somerville, NJ 08876 · Serving Somerset, Middlesex, Hunterdon & Mercer Counties