Top Hidden Laptop Features Everyone Should be Using
While the world of technology is ever-evolving and expanding, it seems laptops haven’t changed much within the past few decades. Although they have gotten smaller and more advanced, your typical laptop remains pretty standard from its features to its design. However, one thing that has changed is the availability and widespread ownership of laptop computers. In fact, Statista says 74% of Americans owned a laptop as of 2019.
While laptops are already streamlined and designed for ease of use, several features often go unnoticed by the average user. These “hidden” features can be used to customize and improve your laptop’s performance according to your personal needs. In this blog, we’ll discuss the top hidden laptop features everyone should be using.
Customize Your Start Menu
A custom start menu is an excellent tool for staying organized with easy access to the apps, programs, and folders you use most. Not only that, but you also can customize its colors and design for a more pleasing aesthetic.
Customize Start Menu Windows 10
- Access Settings > Personalization > Start > Pick which folders to appear on Start
- From there, you can switch the following icons on/off: Settings, Documents, Pictures, Music, Network, Videos, and Personal Folder
- Play with the settings to discover which recently installed apps you’d like to show/hide
- If you wish, you can switch on the full-screen Start menu by visiting: Settings > Personalization > Start. Then, switch on the full-screen Start menu
- Change the color of your start menu by going to Settings > Personalization > Colors. Under the “Show accent color on the following…”, select start, taskbar, and action center, then pick the color you prefer
Customize Start Menu Windows 11
While The new Windows 11 start menu isn't quite as customizable as Windows 10, there are still many ways to modify it and make it your own. For example:
- Click on Settings and go to Personalization > Start. There, you can decide to hide recently installed apps, frequently used apps, and recently opened items. Keep in mind, however, that turning off these three categories will produce an empty Start menu
- To include folders on the bottom of the Start menu, go to Settings > Personalization > Start > Folders, and turn on the switch next to the folders you wish to include
- To eliminate select pinned apps from the Start menu, right-click said app's icon and click Unpin from Start. On the other hand, to add a pinned app, right-click an app that isn't in the Start menu and choose Pin to Start. Then, you can change the order by dragging and dropping pinned apps.
- In Windows 11, the Start button is found in the middle of the taskbar rather than the lower-left corner of the screen like in Windows 10. If you prefer Windows 10 set-up, visit Settings > Personalization > Taskbar > Taskbar behaviors and use the dropdown menu to switch the location from center to left.
Shut Down PC in One Swipe
Are you looking for a quicker, more efficient way to shut down your laptop? If so, you’ll be pleased to know there’s a cool laptop feature that allows you to shut down your device with one swipe of the finger. If you’re interested in trying out this feature, take the following steps:
- Right-click any empty area on your desktop and select New > Shortcut
- Copy and paste this code into the text box: %windir%\System32\SlideToShutDown.exe. Click next
- Name the file accordingly
- The icon should appear on your home screen. Right-click the icon and select Properties
- Under your shortcuts tab, choose Change Icon > Ok
- Pick the icon you prefer and click Ok > Apply > Ok
Employ MacOS’s Screenshot and Recorder Tool
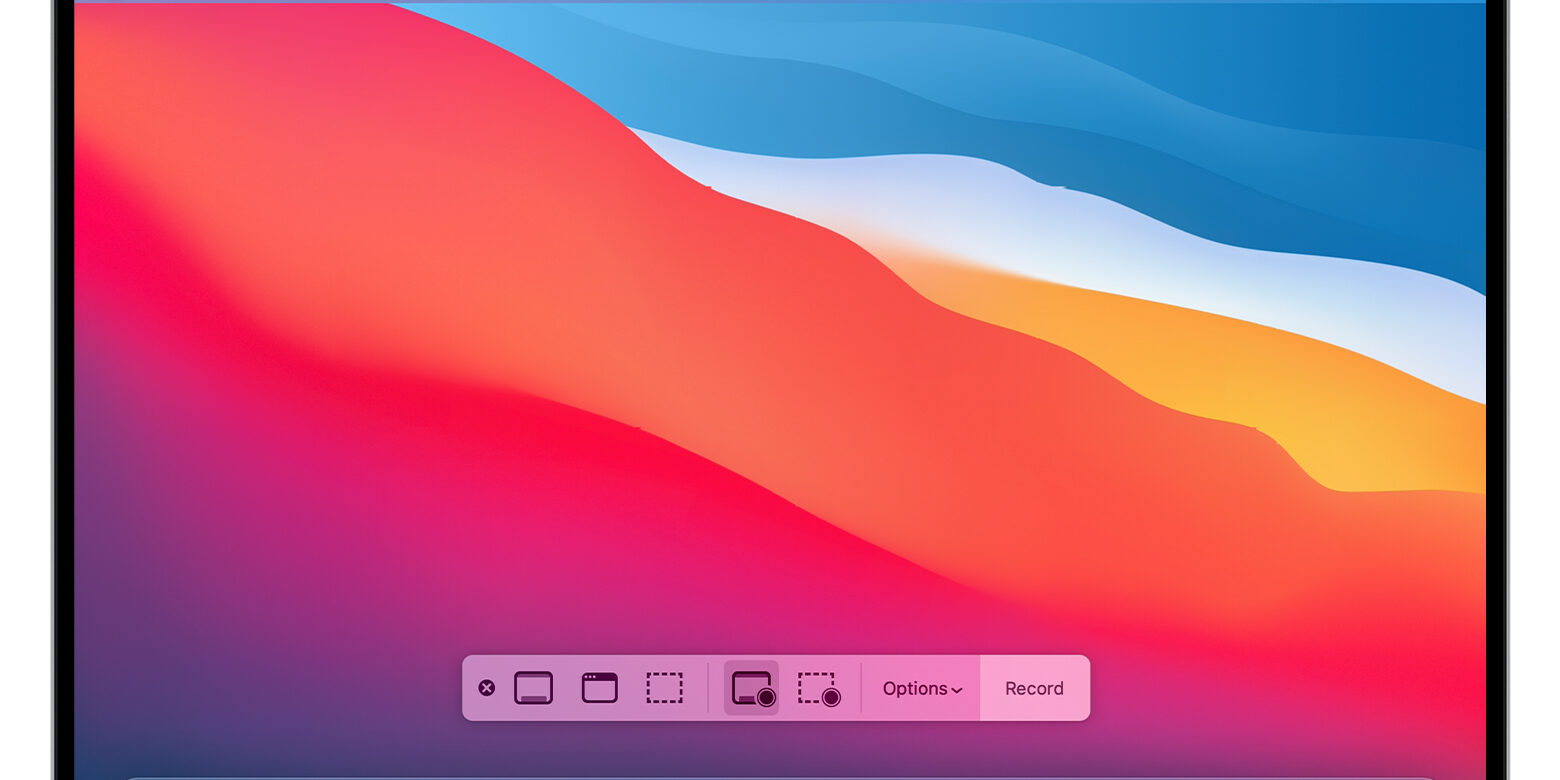
If you have a Macbook then you’re likely aware of the ability to take screenshots with QuickPlayer’s Screen Recorder. However, you might be surprised to learn that Mac computers also have a separate all-in-one tool for capturing screenshots. Those that have discovered this feature often describe it as Mac’s best-kept secret. It works by launching a dashboard-like interface with all the options you need to capture your screen in one location.
Mac’s screenshot tool “hidden” feature allows you to capture all or a portion of your display, and decide whether you want microphone input, the pointer, and more. To utilize this feature, either:
- Access it via the launchpad
- Use Cmd + Shift + 5
Remain Focused
According to Tech Republic, 470 million people will use a laptop for work in 2022. This growing number is due, of course, to the widespread shift to remote work after the pandemic. If you are one of the many Americans that use a laptop for work purposes, you likely find distractions from social media, online shopping, and non-work-related emails to be somewhat bothersome. Luckily, the average laptop has a little hidden feature that eliminates distractions from notifications.
Set Up Focus Assist on Windows 10
- Go to Start > Settings > System > Focus assist
- Choose between Off or receive all notifications, Priority only or see only notifications from a customized list, or Alarms only where you’ll see nothing but alarms
To customize which applications are considered a priority, click Customize Your Priority list under the Priority Only setting. Here, you can also choose to get a notification after Focus Assist ends to discover what notifications you missed. To do so, select Show me a summary of what I missed while focus assist was on
Set Up Focus Assist on Windows 11
- Click Start > Settings > System > Focus assist
- Choose between Priority Only and Alarms Only to see and hear fewer notification alerts
- Select which notifications are allowed by choosing Priority Only > Customize priority list, then changing the options based on your preferences
Pin Universal Media Player to Menu Bar
In terms of Macbook Pro hidden features, one of the more useful is the ability to pin a universal media player to your menu bar. Once you’ve done that successfully, you no longer have to worry about switching back and forth between your current task and your media source to control playback.
This very useful widget makes it easy to pause/play and adjust playback from nearly any platform. This includes everything from YouTube to Apple Music and everything in between.
To successfully pin this universal media player to your menu bar, you should do the following:
- Go to System Preferences > Dock and Menu Bar > Now Playing and check the Show in Menu Bar box. This will activate the widget. To choose whether your media player appears upon powering on or when there is active playback, you also have that option in the dropdown menu below these settings
Activate Dark Mode
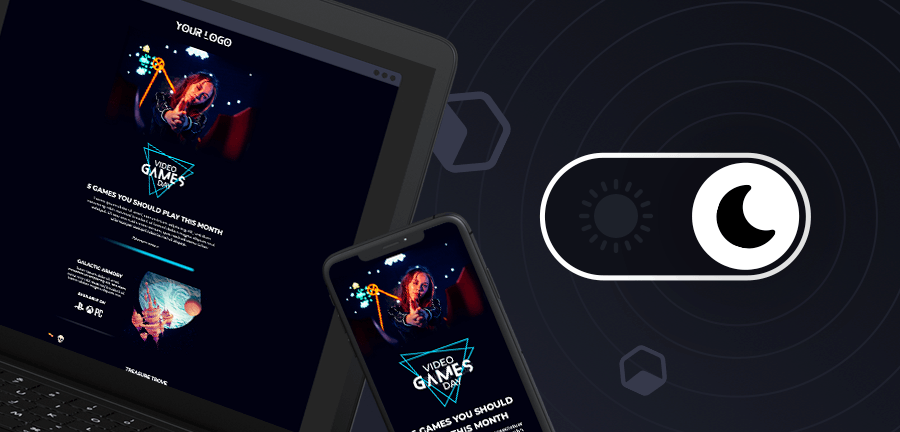
It’s no secret that staring at bright screens for extended periods can cause eye strain as well as headaches. If you’re on your laptop frequently, you’ve likely experienced these forms of discomfort as a result. Luckily, laptops and other devices today allow you to switch on dark mode and alleviate/prevent that strain. Beyond the physical benefit, utilizing dark mode can also increase your laptop’s battery life. To activate dark mode, you’ll need to do the following:
- Access your settings menu
- Choose Personalization > Colors
- Go to the section entitled “Choose Your Color”
- Select Dark to initiate dark mode
Pin Sites to Your Dock or Taskbar
Did you know that in addition to pinning files and folders to your dock or taskbar you can also pin regularly frequented websites? This hidden laptop feature makes it easy to keep all your regular sites in one place, right at the forefront for quick and easy access.
For Mac users, it’s as simple as dragging an URL from the Safari address bar down to the right-hand side of the dock. For Windows users, open your main browser menu then choose More Tools and Pin to Taskbar.
Hidden Laptop Features for Everyday Use
In a world that’s becoming increasingly reliant on laptops, you must understand how to use them to remain effective. Not only for basic operation but also for all of their unique, hidden features designed to make work life easier. Because when your laptop is not as streamlined and efficient as possible, you’re likely to lose valuable time. With these helpful tips, you can start to take advantage of everything your laptop has to offer.