How to Upgrade a Prebuilt Gaming PC: What's Worth It and What Isn't
You bought a prebuilt gaming PC a few years ago, the games you play have gotten heavier, and now you're wondering whether to upgrade it or replace it. The honest answer is that most prebuilts can take a meaningful upgrade, but the big-brand ones hide traps that a parts list from the internet won't warn you about: a 400-watt power supply with the wrong cables, a motherboard shaped like nothing sold in stores, a BIOS that refuses to run faster memory. This guide walks through what to check before you spend a dollar, which upgrades pay off in order, the power and clearance numbers for current graphics cards, and the point where upgrading stops making sense and a new build starts. I do this work every week at my shop in Somerville, New Jersey.
In this guide
- Can you upgrade a prebuilt gaming PC? Yes, with three caveats
- Step one: find out exactly what you have
- The upgrades that pay off, in order
- Graphics card: power, cables and clearance
- Memory: the cheapest fix for stutter
- Storage: hard drive to NVMe
- Processor: where prebuilts fight back
- Power supply and cooling
- When to stop upgrading and build
- Doing the upgrade: order of operations
- Problems after the upgrade
- Frequently asked questions
- Sources
Can You Upgrade a Prebuilt Gaming PC?
Yes. The question is how far, and that depends on who built it.
There are two kinds of prebuilt. Boutique builders (iBUYPOWER, CyberPowerPC, Skytech, NZXT and similar) assemble their machines from the same retail parts a custom builder uses: a standard ATX or micro-ATX motherboard, a standard ATX power supply, a case with normal drive bays and fan mounts. Those upgrade like any custom PC. Big-brand prebuilts from HP, Dell (including Alienware), Lenovo and Acer are engineered to hit a price and a form factor, and that's where the three caveats come from.
- Proprietary motherboards. Many OEM boards are custom shapes with custom mounting holes, custom front-panel headers and sometimes custom power connectors. You usually can't replace the board with a retail one and keep the case, and you can't move the board into a retail case.
- Undersized, proprietary power supplies. A 300 to 500 watt unit with exactly the cables the original parts needed, sometimes with a non-standard motherboard connector. That's the single biggest limit on a graphics card upgrade.
- Locked or stripped-down BIOS. OEM firmware may not expose XMP/EXPO memory profiles, may not support processors the machine never shipped with, and may not let you adjust fan curves.
Even with all three caveats, the graphics card, memory and storage are upgradable on almost everything. Those happen to be the three upgrades that matter most for gaming, which is why a prebuilt upgrade is usually worth doing once. It's the second round of upgrades, when you start eyeing the processor and the board, that gets expensive.
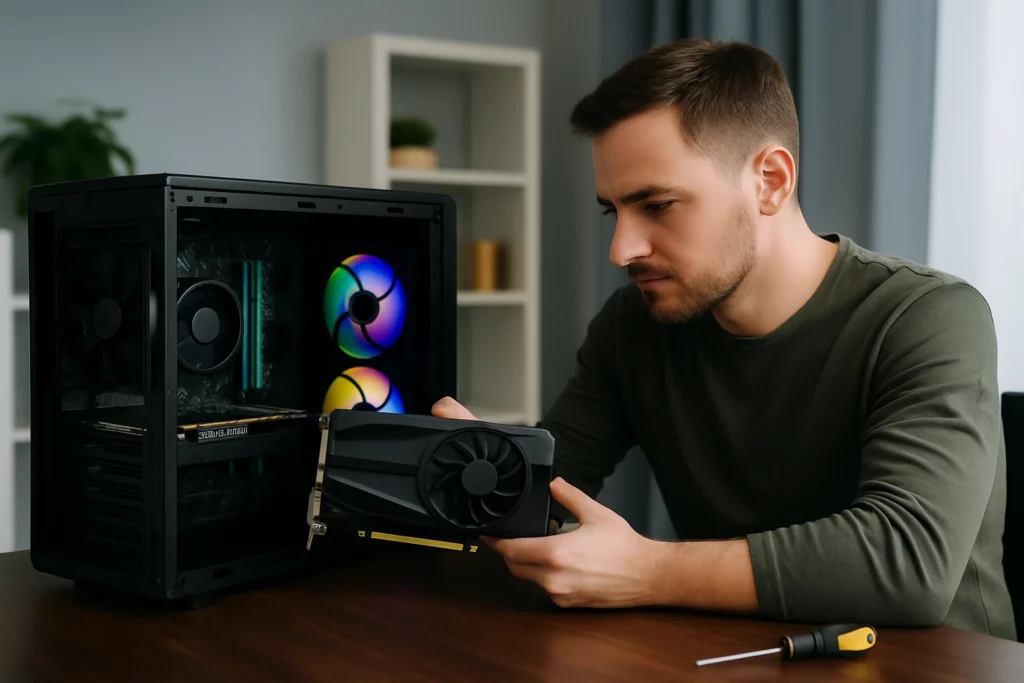
Step One: Find Out Exactly What You Have
Ten minutes here prevents the most common upgrade mistake, which is buying a part that doesn't fit, doesn't connect, or doesn't get enough power.
Start in Windows. Press Ctrl+Shift+Esc to open Task Manager, click Performance, and you'll see the processor model, how much memory is installed and in how many slots, the graphics card, and each drive. Typing dxdiag into the Start menu gives the same information plus the motherboard model on the System tab. Write all of it down.
Then open the case, because the two things that matter most aren't visible in software:
- The power supply label. Total wattage, and specifically the amperage on the +12V rail. Count the PCIe power cables (6+2-pin or 8-pin) and note whether any are unused. If the cables are hard-wired and short, or the motherboard connector looks like nothing you've seen in a build video, you have a proprietary unit.
- Clearance. Measure from the back of the case (where the card's bracket sits) to the first obstruction, usually a drive cage or the front fans. Measure the height from the motherboard to the side panel. Note how many expansion slots are open below the top PCIe slot.
- Memory slots. Two or four, and how many are filled. Note the sticker on the existing modules for type (DDR4 or DDR5) and speed.
- Storage slots. Look for an M.2 slot on the board (a short horizontal slot with a standoff screw), whether it's occupied, and how many SATA ports are free.
- The cooler. A stock downdraft cooler on a hot processor is a sign the case has limited airflow, which affects what graphics card you can cool.
The Upgrades That Pay Off, In Order
This ranking assumes a typical two-to-four-year-old prebuilt. Your inventory from the last step decides which rows apply to you.
| Upgrade | What it fixes | Works on most prebuilts? | Watch out for |
|---|---|---|---|
| Graphics card | Low frame rates, can't turn settings up, no ray tracing or DLSS/FSR support | Yes, within power and space limits | PSU wattage and cables, card length, CPU that can't keep up at 1080p |
| Memory to 32 GB | Stutter, hitching in open-world games, browser tabs slowing the game | Yes | Matching DDR type and speed, only two slots, OEM board without XMP |
| NVMe SSD | Long load screens, slow boot, texture pop-in on drive-heavy games | Yes if there's an M.2 slot; SATA SSD otherwise | Cloning vs. fresh install, slot may share bandwidth with a SATA port |
| Monitor | A 60 Hz panel hides everything a new card can do | Always | Often the real bottleneck people overlook |
| Power supply | Enables a bigger graphics card; replaces a tired OEM unit | Only if the original is standard ATX | Proprietary connectors on Dell and some HP models |
| Processor | CPU-bound games, streaming while gaming, high refresh at 1080p | Sometimes | Socket, OEM BIOS support, cooler, board power delivery |
| Cooling and fans | Thermal throttling, noise, a graphics card that runs hot in a closed case | Usually | Limited fan mounts, 3-pin vs 4-pin headers, OEM fan control |
| Motherboard | Nothing on its own; it's the gateway to a new processor and memory | Rarely on big-brand prebuilts | At this point you're building a new PC; see below |
If you only do one thing, do the one that matches your complaint. Low frame rates is the graphics card. Stutter is memory. Long loading is storage. "It feels old" is usually all three, in which case read the section on building instead before you buy.
Graphics Card: Power, Cables and Clearance
The upgrade with the biggest payoff, and the one most likely to be blocked by the power supply.
A graphics card has three requirements your prebuilt has to meet. It needs a power supply with enough wattage and the right cables, a case with enough length and slot width, and a processor fast enough to feed it. The card makers publish the first two. Here are the current numbers for the cards I install most:
| Card | Total graphics power | Required system power (manufacturer) | Power connectors |
|---|---|---|---|
| GeForce RTX 5060 | 145 W | 550 W | 1x 8-pin, or 300 W+ PCIe Gen 5 cable |
| GeForce RTX 5060 Ti | 180 W | 600 W | 1x 8-pin, or 300 W+ PCIe Gen 5 cable |
| GeForce RTX 5070 | 250 W | 650 W | 2x 8-pin via adapter, or 300 W+ PCIe Gen 5 cable |
| GeForce RTX 5070 Ti | 300 W | 750 W | 2x 8-pin via adapter, or 300 W+ PCIe Gen 5 cable |
| GeForce RTX 5080 | 360 W | 850 W | 3x 8-pin via adapter, or 450 W+ PCIe Gen 5 cable |
| Radeon RX 9070 XT | 304 W | 750 W | 2x 8-pin |
Figures from NVIDIA's and AMD's product pages as of this writing. Board-partner cards with bigger coolers can draw more and may add a connector; check the box. Required system power assumes a whole PC, not just the card.
Now compare that with the label you photographed. A prebuilt with a 400 to 500 watt supply is a comfortable home for an RTX 5060 and a stretch for a 5060 Ti. Anything above that means a new power supply first, and on a Dell or many HP models that isn't possible without adapters I don't recommend. The cheap "wattage isn't everything" advice you'll see in forums is true in a well-built system with a quality supply; it's dangerous advice for an OEM unit that was specced to the watt for the original parts.
Connectors: current NVIDIA cards ship with an adapter that turns two or three 8-pin PCIe cables into the 12V-2x6 connector on the card. Each 8-pin cable has to come from the power supply on its own lead; daisy-chaining one cable's two plugs into a high-draw card is how the melted connector jobs land on my bench. Radeon cards mostly still use 8-pin plugs directly.
Clearance: the card's length is on its product page. Compare it to the measurement you took, and leave 15 to 20 mm for the power cable to bend. Most current mid-range cards are 2 to 2.5 slots thick; a prebuilt with an M.2 slot or a Wi-Fi card directly under the top PCIe slot can lose it to the card's cooler.
The processor: at 1080p, a fast graphics card waits on the processor. An RTX 5070 Ti paired with a four-year-old six-core chip will run the same frame rate as a 5070 in a lot of games. If you game at 1440p or 4K the card matters more and the processor less. My post on AMD vs. NVIDIA cards in 2026 covers picking the card, and the PSU wattage guide goes deeper on sizing the supply.
Memory: The Cheapest Fix for Stutter
If the prebuilt shipped with 8 or 16 GB, this is the upgrade with the best return per dollar.
Current games and the Windows 11 environment around them are comfortable at 32 GB. At 16 GB with Discord, a browser and a launcher open, you'll see hitching as the system pages to disk. At 8 GB you're in real trouble. The fix is straightforward on paper: fill the slots with a matched kit at the speed the board supports.
The prebuilt-specific rules:
- Match the type. DDR4 and DDR5 aren't interchangeable and the slots are keyed differently. The sticker on the installed module tells you which you have; my DDR4 vs. DDR5 guide explains why it matters.
- Run two identical modules. Two sticks in the right slots (usually the second and fourth from the CPU, but check the board manual) give you dual-channel bandwidth. One big stick doesn't. Mixing a new stick with the OEM stick usually works but runs at the slower module's speed, and sometimes doesn't post at all.
- Check for XMP or EXPO. Retail memory advertises a speed that only applies when the BIOS profile is turned on. Some OEM boards don't offer the profile at all, so a 6000 MT/s kit runs at the DDR5 default of 4800. It still works; you just paid for speed you can't use. Buy the kit whose base speed matches what the board will actually run.
- Two slots means replace, not add. Many compact prebuilts have two slots, both filled. You're pulling the old sticks out, not adding to them.
After installing, open Task Manager's Performance tab, click Memory, and confirm the total, the speed, and that it says "Slots used: 2 of 2" or "2 of 4." If the speed is lower than the kit's rating, look for XMP or EXPO in the BIOS.
Storage: Hard Drive to NVMe
If Windows is on a spinning hard drive, this upgrade changes how the whole computer feels, not just games.
A surprising number of budget prebuilts from a few years ago shipped with a 1 TB hard drive, or a 256 GB SATA SSD for Windows and a hard drive for everything else. Games installed on the hard drive load slowly and stream textures late. The upgrade is an NVMe SSD in the board's M.2 slot, which most prebuilt boards from the last five years have. If yours doesn't, a 2.5-inch SATA SSD is still several times faster than a hard drive and plugs into the same cables the hard drive uses.
Two decisions: capacity and clone-versus-fresh. On capacity, 1 TB is the practical floor when games routinely take 100 GB apiece; 2 TB if you keep more than a handful installed. On clone-versus-fresh, cloning the old drive to the new one keeps everything as it was, including years of leftover junk. A fresh install is cleaner and takes an afternoon; my Windows 11 clean install guide walks through it. Either way, back up first.
One prebuilt quirk: on some boards the M.2 slot shares bandwidth with a SATA port, and populating the slot disables that port. If a drive disappears after you install the NVMe, that's why. The board manual (search the model from dxdiag) will say which port. My SSD health guide is worth a read before you decide whether the old drive is worth keeping as secondary storage.
Processor: Where Prebuilts Fight Back
The upgrade with the most ways to go wrong, and the one I most often talk customers out of.
A processor upgrade needs four things to line up: the same socket (AM4, AM5, LGA1700, LGA1851 and so on), a BIOS that recognizes the new chip, a cooler that can handle its heat, and a board whose power delivery can feed it. On a boutique prebuilt with a retail board, all four are checkable from the board maker's support page and it's a normal upgrade. On a big-brand prebuilt:
- OEM BIOS updates often add support only for processors the maker sold in that model. A retail board might take a whole generation; the OEM board takes the three chips that shipped in it.
- The stock cooler was chosen for the original chip. Dropping in a hotter processor on the same cooler gets you throttling, not speed.
- Board power delivery on budget OEM boards can be marginal for the top chips in the socket.
The practical test: find your exact model on the manufacturer's support site and look at the list of processors it shipped with. If the fastest one is a worthwhile jump from yours, it's a candidate, and my CPU upgrade service page covers what's involved. If the list tops out near what you already have, the socket is a dead end and the processor conversation becomes the build conversation below. When a processor swap is possible, it's also the moment to replace the thermal paste and consider a better cooler, since the case is already open.
Power Supply and Cooling
Neither adds a single frame on its own. Both decide what the rest of the upgrades can do.
Power supply
If your inventory showed a standard ATX supply, replacing it is the gateway to a real graphics card upgrade. Buy for the card you're installing plus headroom, from a maker with a real warranty, and prefer an ATX 3.x unit with a native 12V-2x6 cable if you're going NVIDIA. If the inventory showed a proprietary unit (Dell's small-form-factor desktops and many Alienware Auroras are the usual suspects, along with some HP Pavilion and OMEN towers), check whether the manufacturer sells a higher-wattage version for your model. If not, this is the hard ceiling on the machine. Adapters that convert a standard supply to a proprietary board connector exist; I've seen enough of them fail to skip them. The power supply upgrade service page has more, and my post on power supply cables explains why you never reuse modular cables from a different unit.
Cooling
Prebuilt cases are built to a price, and airflow is where the price shows. Solid front panels with a slot at the bottom, one exhaust fan, and a graphics card breathing its own hot air. Before you install a 250-watt card, look at the intake path. Adding a front fan if there's a mount, cleaning the dust filters, and replacing thermal paste that's been on the processor since the factory are cheap and often gain more than people expect. If the card you want runs hot and the case has no intake to speak of, the case is part of the upgrade, and on a proprietary board it can't be replaced. That's a signal to read the next section.
When to Stop Upgrading and Build
The half rule, and the three-part rule.
Two tests I use at the counter:
- The half rule. Add up the upgrades that would get the machine where you want it. If that total is more than about half the cost of a new system that does the job, build. You'd be putting new parts into an old chassis with an old power supply and a board you can't replace, and you'll be back in two years.
- The three-part rule. If the list includes the motherboard, the processor and the power supply together, you are already building a new computer; you're just doing it inside a case that wasn't designed for it. Move the graphics card, memory and drives into a purpose-built system and sell or hand down the prebuilt.
The good news is that a graphics card, memory and NVMe drive you bought for the prebuilt all carry over to a new build, so an upgrade now isn't wasted money later. My build or upgrade page runs through the decision in more detail, why I don't like prebuilts explains the corners big-brand machines cut, and reusing old parts in a new build covers what's worth keeping. When it's time, the custom PC build service starts with a consultation where I look at what you have.
Doing the Upgrade: Order of Operations
The steps that keep a two-hour job from becoming a two-day one.
Back up
Anything you can't replace goes to an external drive or the cloud before the case opens. A slipped screwdriver near a drive is rare but not unheard of.
Update the BIOS first
For a processor or memory upgrade, install the latest BIOS from the manufacturer's support page while the old parts are still in and working. Doing it afterward, on a board that won't post, isn't possible on most OEM machines.
Uninstall the old graphics drivers
For a graphics card swap, remove the old drivers completely before pulling the card. Tom's Hardware has a good walkthrough on removing NVIDIA, AMD and Intel GPU drivers. Leftover drivers are the most common cause of "the new card is slower than the old one."
Power off, unplug, discharge
Shut down, flip the power supply switch off, unplug the cord, then hold the power button for ten seconds to drain the board. Touch bare metal on the case before you touch a component, and work on a hard floor rather than carpet.
Photograph, then remove
Photos of every cable before it comes out. Graphics cards have a retention clip at the back of the PCIe slot that has to be released before the card will lift; forcing it breaks the slot. Memory clips open outward.
Install and connect power
Seat the card until the clip clicks, screw the bracket down, then connect the PCIe power cables, each one on its own lead from the supply. Push the 12V-2x6 connector until it's fully home and the latch engages; a partially seated connector is the melting kind.
First boot with the side panel off
Plug in, switch on, and watch that every fan spins and the board's status LEDs (if it has them) clear. If it doesn't post, power off and reseat the memory and the card before assuming anything is broken. My post on a prebuilt that won't start after an upgrade lists the usual causes.
Drivers, BIOS settings, then test
Install the current graphics driver from NVIDIA or AMD, turn on XMP/EXPO in the BIOS if it's available, then run a game you know for twenty minutes while watching temperatures. Tom's Hardware explains how to check graphics card temperature. Sustained temperatures in the mid-80s Celsius or higher on the card mean the case needs airflow work.
Problems After the Upgrade
These are the calls I get the week after someone does a prebuilt upgrade at home.
| Symptom | Usual cause on a prebuilt | Fix |
|---|---|---|
| Fans spin, no picture, no beep | Card or memory not fully seated; monitor plugged into the motherboard's video port instead of the card | Reseat everything; move the cable to the card |
| Boots, then shuts off under load | Power supply can't sustain the new card's draw | Bigger supply if the board allows; otherwise a lower-power card |
| New card is slower than the old one | Leftover drivers, or the game is pinned on the processor | Clean driver reinstall; check CPU usage in Task Manager while playing |
| Memory shows the right total but games still stutter | Single-channel (sticks in the wrong slots) or running at base speed with no XMP | Move to the paired slots; enable the profile if the BIOS has one |
| A drive vanished after adding an NVMe SSD | Shared bandwidth between the M.2 slot and a SATA port | Move the SATA cable to another port per the board manual |
| Burning smell or a discolored power connector | Partially seated 12V-2x6 or a daisy-chained PCIe cable | Stop using it and bring it in; see the melted connector post above |
| Everything works but it's louder and hotter | The case can't move enough air for the new card | Add intake, clean filters, repaste, or accept that the case is the limit |
If the machine feels no faster after all this, my post on why a prebuilt PC is slow after an upgrade walks through the diagnosis, and common prebuilt gaming PC failures covers the parts that tend to die first.
Not sure what your prebuilt can take? Bring the tower to Somerville. I'll check the power supply, board, BIOS and clearance, tell you exactly which upgrades will work, and quote the parts and labor together. The $75 diagnostic is credited toward the work, and first-time customers get $25 off upgrade labor.
📞 Call (908) 428-955875 N Bridge St, Somerville, NJ. Mon to Fri 10 to 5, Sat 9 to 2. Walk-ins welcome.
Frequently Asked Questions
Can you upgrade a prebuilt gaming PC?
Yes, almost always. Graphics card, memory and storage upgrades work on nearly every prebuilt. The limits show up when you try to change the processor, power supply or motherboard, because big-brand prebuilts from HP, Dell and Lenovo often use custom-shaped boards, proprietary power connectors and small cases that don't accept standard parts.
What is the best upgrade for a prebuilt gaming PC?
For frame rates, the graphics card, as long as the power supply and case can handle the new one. If the PC has 8 or 16 GB of memory, going to 32 GB is the cheapest upgrade that fixes stutter. If Windows still lives on a hard drive or a small SATA SSD, an NVMe drive makes the whole machine feel new.
Will a new graphics card work with my prebuilt power supply?
Check three things: the wattage on the power supply label against the card maker's required system power (NVIDIA lists 550 W for an RTX 5060, 650 W for an RTX 5070 and 850 W for an RTX 5080), whether the supply has the PCIe power cables the card needs, and whether the supply is a standard ATX unit you could replace. Many Dell and HP prebuilts ship with 300 to 500 W supplies and proprietary connectors, which caps what you can install.
Does upgrading a prebuilt PC void the warranty?
In the United States, opening the case and adding parts does not by itself void a warranty; the Magnuson-Moss Warranty Act prevents manufacturers from voiding coverage over unrelated repairs or upgrades. The manufacturer can refuse to cover damage caused by your upgrade. Keep the original parts and receipts, and check the maker's policy on warranty seals before you start.
Can I put a new CPU in a prebuilt gaming PC?
Sometimes. The new processor has to use the same socket as the motherboard, the OEM BIOS has to support it, and the cooler and power delivery on the board have to handle it. Big-brand prebuilts frequently lock the BIOS to the processors they shipped with, so a CPU upgrade is the one I most often recommend checking with a technician before buying anything.
Why is my prebuilt PC not faster after a GPU upgrade?
The usual causes are a processor that can't feed the new card at 1080p, memory running in single-channel mode or at its slowest speed because the OEM board lacks XMP, leftover drivers from the old card, or a monitor whose refresh rate caps what you can see. There's a separate guide above on why a prebuilt feels slow after an upgrade.
When is it better to build a new PC than upgrade a prebuilt?
When the upgrade list includes the motherboard, processor and power supply together, you're rebuilding the computer inside a case that was never designed for it. At that point a purpose-built system costs little more, cools better and is easier to upgrade later. If the upgrades you need add up to more than about half the price of a new build, build.
Does Dave's Computers upgrade prebuilt gaming PCs?
Yes. Bring the tower to the shop in Somerville. I inspect the power supply, board, case clearance and BIOS, tell you which upgrades will actually work, supply the parts and install them, then test the system before you pick it up. The $75 diagnostic is credited toward the work.
Sources
- NVIDIA, GeForce RTX 5060 Family specifications
- NVIDIA, GeForce RTX 5070 Family specifications
- NVIDIA, GeForce RTX 5080 specifications
- AMD, Radeon RX 9070 XT specifications
- Tom's Hardware, How to uninstall NVIDIA, AMD and Intel GPU drivers
- Tom's Hardware, How to check your graphics card temperature
- Federal Trade Commission, Businessperson's Guide to Federal Warranty Law (Magnuson-Moss Warranty Act)
Want It Done Right the First Time?
Bring your prebuilt to my shop in Somerville. I'll tell you what it can take, supply the parts, install and test them, and you pick up a faster computer.
📞 (908) 428-9558Dave's Computers · 75 N Bridge St, Somerville, NJ 08876 · Mon to Fri 10am to 5pm, Sat 9am to 2pm · Serving Somerset, Hunterdon, Middlesex and Mercer counties